Skip to content

Making Soap Naturally

Professional recipes and advice about everything soap!

Menu
  • HOME
  • SCENTS
    • antibacterial essential oils list
    • are perfumes toxic?
    • How to use Essential Oils
    • Cedarwood Essential Oils
    • Essential Oil Blends
    • Frankincense Essential Oil
    • Lavender Essential Oil
    • Rosemary Essential Oil
    • Tea Tree Essential Oil
  • SOAP BASES
    • Basic Soap Recipes – my 6 at a glance
    • #1 – Olive and Coconut, No Palm
    • #2 – Olive, Coconut and Palm
    • #3 – Olive, Coconut & Palm Kernel
    • #4 Olive, Coconut, Palm & Less Water
    • #5 Olive, Coconut, Palm Kernel & Less Water
    • #6 Castile, Just Olive
  • THE SOAPS
    • Baby Soap
    • Beer Soap
    • Castile Soap
    • Charcoal Soap
    • Coffee Soap
    • Dead Sea Mud Soap
    • Gardeners Soap
    • Green Mint Tea
    • Grocery Store Soap
    • Laundry Soap
    • Melt and Pour
    • Pet Shampoo
    • Recycle Bar Soap Pieces
    • Salt Soap
    • Shampoo Bar
    • Simple Halloween Recipe
  • BATH AND BODY
    • Bath Bombs
    • Bath Salts
    • Face Mask
    • Hemp Butter
    • Lip Balm
    • Lotion Bar
    • Whipped Shea Butter
  • SOAP SUPPLIES
    • Supplies you will need
    • Digital or Electronic Scale
    • Escali 136DK Alimento Digital Scale Review – To Weigh your Soap Making Oils
    • Soap Boxes
    • Soap Making Books
    • Where to buy soap making supplies
  • INGREDIENTS
    • Properties of Soap Making Oils
    • Shelf Life of Oils
    • Apricot Kernel Oil
    • Canola Oil
    • Castor Oil
    • Hemp Seed Oil
    • Neem Oil
    • Olive OIl
    • Palm Oil
  • FAQ’S
    • Craft Fairs and Festival
      • Christmas Craft Fair – just some thoughts as I’m packing
      • The Farmers Market – Selling your Soap
      • Trade shows
    • How to Pick a Business Name
      • Naming your Soap Company – what is a good name?
    • How much does it cost to make soap?
    • INCI Names
      • What is INCI
    • Labeling the Eco-Friendly Way
      • Organic and Natural Product Labelling Rules
    • Proper storage of the Natural and Handmade Soaps
    • Regulations for Hand made soap
      • Important Product Knowledge
    • Wholesale Handmade Soap or Sell it yourself?
    • Craft Fairs and Festivals – what do I need?
  • Baby Skin Care
    • Baby Soap Recipe
    • Baby Powder Recipe
    • Natural Baby Products
    • Vaseline (nonpetroleum) Recipe
Menu

Hot Process Soap Making Instructions

Posted on 12-0102-04 by Tes

Hot Process Soap Making Instructions

natural-soap-385014_640 
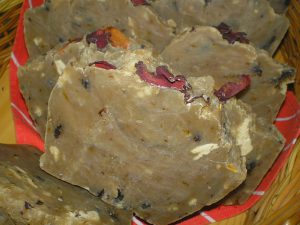
When making soap the Hot Process way you are adding external heat after the oils and lye solution have been mixed and come to trace.


Some of the advantages of using the Hot Process Soap Making method are:

    • Time factor – your soap is ready within approximately 24 hours
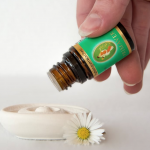
    • Fragrances and Essential Oils are added after cooking so do not have any kind of reaction to the Saponification process
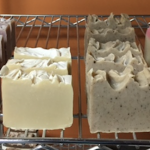
    • It’s easier to cut Hot Process soap than cold process
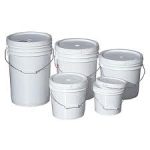
    • No special equipment is needed other than a double boiler for (DBHP), Oven for (OHP) or a Crock Pot for (CPHP)

However, the Hot Process method also has some disadvantages to it, some of which not all soap makers agree with.

  • After being processed the soap becomes like a thick paste and is not as easy to work into some molds that have dividers or it you are want to add different colors, it can be harder to work with being that the soap is so thick.
    • There is a number of soapmakers that think that the high temperatures that the soap riches will destroy or significantly reduce the properties of the oils being used.  Hot Process soap is heated as high as 30 degrees celsius higher than cold process.
    • Hot Process soap can be used within 24 hours of being made, but it is a fact that curing soap improves it.  Curing improves the lather, quality and durability of your soap.
    • Hot Process soap uses more water than Cold Process so may take longer to cure than Cold Process, although the higher temperatures may reduce the extra amount of water as well.

    When making Hot Process Soap the ingredients would be the same as your Cold Process Soap Recipe with the following exceptions:

      • Hot Process Soap will require 300 - 400 grams more water per kilogram than Cold Process
      • Superfatting should be added after cooking to preserve the oils properties
      • Essential Oils, Fragrances, herbs, and other additives as such should be added after cooking
      • Color additives such as oxides and ultramarines should be added before cooking if you want to get a nice color throughout your bar, but they can also be added after if you want a swirl affect.
      • Honey, Sugar or Milks will burn and give you a dark brown soap there will be no benefit to adding them as the temperatures will take that away.  Additives like these are better added to Cold Process soap.

    To Make Hot Process Soap using the Double Boiler Hot Process Method

    1. Make your soap as you would for your cold process recipe remembering to add the extra water as noted above.
    2. When your soap reaches trace, put the pot into a double boiler (making sure the soap pot is submerged halfway up in water) cover the pot with a lid.
    3. Once the water in the pot comes to a boil turn it down and simmer
    4. Simmer for an hour, at this time your soap should be a nice golden yellow color and look like jelly.
    5. Test the soap by taking a small amount out of the pot, when it's cooled a bit, take it and roll it between your fingers.  If it keeps it's shape and turns white it is cooked.  If its sticky it is not ready yet and if it crumbles it's overcooked but is still okay, it will just be harder to mold.
    6. It depends on how big your batch of soap is as to how long it needs to cook but anywhere between 1 and 2 hours.  Just keep an eye and test it.
    7. When your soap is ready turn off the heat and let the water in the boiler cool down to 50 degrees celsius and keep the lid on the soap pot while the water is cooling down.
    8. Now you can add your scent and any other ingredients being sure to mix them in well.
    9. When the ingredients are all mixed in scoop your soap out and into molds.


    Making Hot Process soap in the Oven

    1. Using this method your would follow the instructions above, but instead of putting your pot in the double boiler, place it in the oven.
    2. The oven should be preheated to 100 degrees celsius and turned off once the pot is put in the oven
    3. Leave the soap pot in the oven for an hour and then test it as described in the DBHP method, and when ready add other ingredients and pour into molds.

    However, the Hot Process method also has some disadvantages to it, some of which not all soap makers agree with.

    This method sounds very easy, actually a lot easier than the DBHP, but as with Cold Process soap the temperatures are important.

    The oven temperature must be constantly low and once it's shut off, your oven may not stay warm long enough as each oven is different.


    Crock Pot Hot Process Method

    This method is may be a better one as the crock pot will keep a constant temperature over a long period of time.  The only downfall is that the crock pots are not that large, so best for smaller batches.

    Using the CPHP method, you will put your prepared soap into the inner container of the crock pot and cook on low for about 45 - 120 minutes, depending on the size of your crock pot and the amount of soap you are making.

    One the soap is ready (after testing) simply let the soap mixture cool down to just below 60 degrees celsius, add your ingredients and spoon out into your molds.

    cold process soap
    Cold Process Step
    All Natural Soap Making
    Making Goat Milk Soap
    Melt and Pour Soap
    Melt and Pour Soap
    Soap Making Oils
    Soap Making Oils
    Scenting Soap
    Adding Scent to Soap


    color handmade soap
    How to color soap


    © 2016 - 2019, Tes. All rights reserved.

    Leave a Reply Cancel reply

    Your email address will not be published. Required fields are marked *

    • 🧼 Layered Swirl Technique for Cold Process Soap
    • 🧼 Chopstick Or Skewer Swirl: Elegant Lines In Cold Process Soap
    • 🧼 How-To: Hanger Swirl Color Your Cold Process Soap
    • 🧼 Cold Process Lime Drop Soap Recipe
    • 🧼 Drop Swirling For Cold Process Soap: Create Stunning Designs With Ease
    1. Tes on bug repellent plants11-09

      Thank you so much for your kind words! I’m really glad you enjoyed the article and found it helpful. 😊…

    2. Tes on Using Natural Colors In Soap Making11-06

      Thanks so much.  Clays and mineral oxides (like French green, rose clay, or kaolin) tend to remain stable, while more delicate…

    3. Sharon on Using Natural Colors In Soap Making11-06

      I love the idea of colouring soap naturally. It feels like such a beautiful way to connect creativity with nature.…

    4. Cian on Using Natural Colors In Soap Making11-05

      his is such a fantastic and comprehensive guide! I love how you not only list the natural colorants but also…

    5. Tes on Trending Natural Soap Ingredients & Sustainable Practices In 202509-08

      Thank you so much—I’m glad you enjoyed it! I’ve been experimenting with a few of these trends, and the one…

    200x400
    • Privacy Policy

    Recent Posts

    • 🧼 Layered Swirl Technique for Cold Process Soap
    • 🧼 Chopstick Or Skewer Swirl: Elegant Lines In Cold Process Soap
    • 🧼 How-To: Hanger Swirl Color Your Cold Process Soap
    • 🧼 Cold Process Lime Drop Soap Recipe
    • 🧼 Drop Swirling For Cold Process Soap: Create Stunning Designs With Ease

    Making Soap Naturally is a participant in the Amazon Services LLC Associates Program, an affiliate advertising program designed to provide a means for sites to earn advertising fees by advertising and linking to amazon.com

    ©2018 Making Soap Naturally

    © 2025 Making Soap Naturally | Powered by Superbs Personal Blog theme