Melt and pour soap making is one of the easiest and safest ways to make homemade soap. Unlike cold process or hot process soap, you don’t need to handle sodium hydroxide (lye), and there’s very little measuring or complicated mixing involved. This makes it a great option for beginners, kids’ projects, or anyone who wants quick results without working with raw lye.
Melt and pour soap is often the first step many people take into the world of soap making. It’s simple, creative, and doesn’t require handling lye. For beginners, it can be a fun and approachable way to explore the craft.
However, not all melt and pour bases are created equal.
In this guide, I’ll walk you through:
- What melt and pour soap really is
- What ingredients are commonly found in soap bases
- The pros and cons of using it
- How to make melt and pour soap step-by-step
- How it compares to cold process soap
If you’re just getting started, this will help you make informed decisions
What Is Melt and Pour Soap?
Melt and pour (often called M&P or glycerin soap) is a pre-made soap base that has already gone through the saponification process. That means the lye and oils have already reacted — the soap is fully formed before you ever buy it.
Your job is simply to:
- Cut it
- Melt it
- Customize it
- Pour it into molds
Because the chemical reaction has already happened, melt and pour soap does not require curing time. Once it hardens, it’s ready to use.
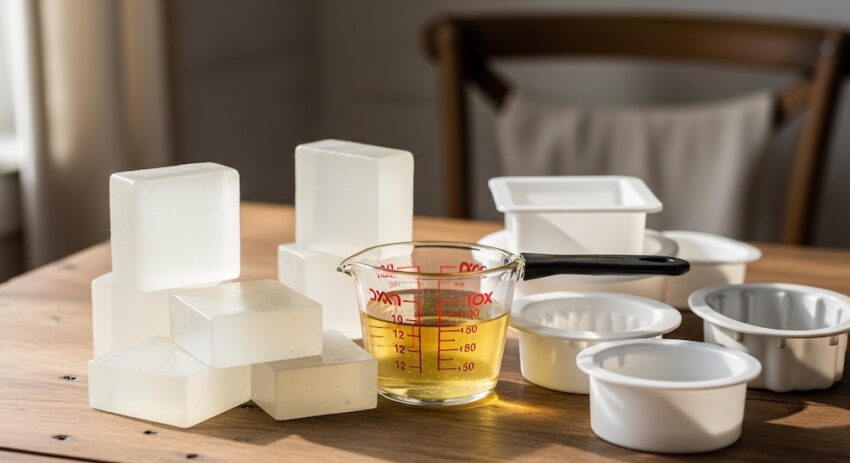
M&P soap typically comes in:
- Clear glycerin blocks
- Opaque white blocks
- Specialty bases (goat milk, shea butter, aloe, etc.)
Is Melt and Pour “Real” Soap?
This is where some confusion happens.
Melt and pour bases are real soap — but you are not creating the soap from scratch. You are customizing a finished product.
With cold process soap, you formulate your oils, calculate your lye, and control every ingredient. With melt and pour, the base manufacturer controls the formulation.
That’s not necessarily bad — but it does mean you need to understand what’s in the base you’re buying.
What’s in Melt and Pour Soap Bases?
Some melt and pour bases are very clean and made primarily from saponified oils and glycerin. Others contain additional detergents and synthetic ingredients.
Here’s an example of ingredients commonly found in some commercial bases:
- Propylene Glycol
- Sorbitol
- Sodium Stearate
- Sodium Laureth Sulfate (SLES)
- Sodium Myristate
- Sodium Cocoyl Isethionate
- Triethanolamine
- Glycerin
- Titanium Dioxide
- Fragrance
You may also see combinations such as:
- Sodium Cocoate
- Sodium Palmitate
- Sodium Laurate
- Sodium Stearate
- Sucrose
- Propylene Glycol
Some of these ingredients help create:
- Transparency
- Better meltability
- Improved lather
- Mold release
However, certain bases include surfactants and detergents (like Sodium Laureth Sulfate), which can be drying or irritating for some people.
Important Tip:
Always read the ingredient list before buying a melt and pour base.
If you prefer more natural formulations, look for bases that avoid:
- Sulfates
- Added detergents
- Synthetic alcohols
- Excess sugar solutions
In recent years, manufacturers have introduced cleaner and more natural M&P options — so good choices are definitely available.
How Melt and Pour Soap Is Made (Commercially)
Commercial melt and pour soap is typically created by:
-
Making soap through traditional saponification
-
Adding solvents such as alcohols and glycols
-
Heating and dissolving the soap to create a transparent, moldable base
This process creates the clarity and easy remelting properties that make melt and pour so convenient.
Unlike many commercial store-bought bars (where glycerin is often removed and sold separately), melt and pour bases usually retain their glycerin, which contributes to their moisturizing feel.
Pros and Cons of Melt and Pour Soap
✔ Pros
- No lye handling required
- Beginner-friendly
- No cure time
- Great for kids or group projects
- Perfect for decorative soaps and embeds
- Easy layering and color work
✖ Cons
- Limited control over ingredients
- Some bases contain detergents
- Can “sweat” in humid climates
- Less formulation flexibility than cold process
- Higher cost per bar compared to making from scratch
Melt and pour is wonderful for creativity. Cold process is where full formulation control begins.
Both have their place depending on your goals.
How to Make Melt and Pour Soap (Step-by-Step)

If you’d like to try it, here are the basic instructions:
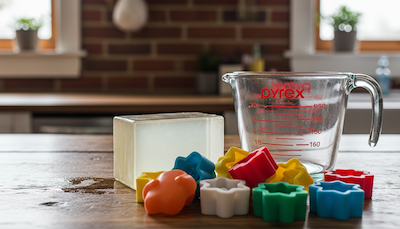
Step 1: Cut the Base
Cut your melt and pour base into small 1–1½ inch cubes.
Step 2: Melt
Place the cubes in a glass Pyrex measuring cup.
Microwave in 25–40 second intervals, stirring between each round.
Alternatively, use a double boiler and stir frequently.
Do not overheat — this can cause bubbling or scorching.
Step 3: Add Color and Scent
Once fully melted:
-
Add soap-safe colorants
-
Add fragrance or essential oils
-
Stir thoroughly
Step 4: Pour Into Molds
Pour into silicone or specialty molds.
If creating layers:
-
Lightly spray each layer with rubbing alcohol before adding the next layer to help them adhere.
Step 5: Let Harden
Allow soap to harden for several hours.
Once firm, pop out of the mold.
Your soap is ready to use immediately.
Creative Ideas for Melt and Pour
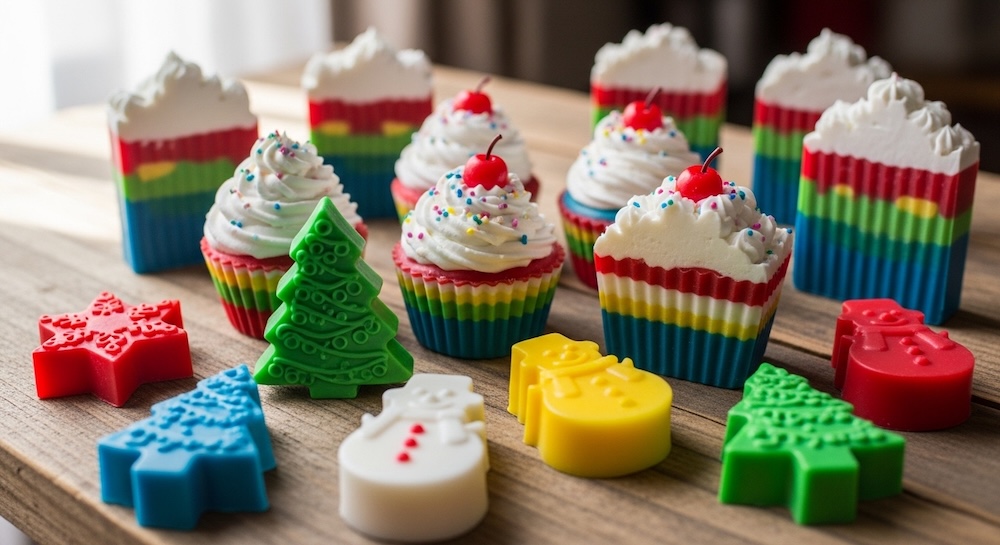
Melt and pour is especially popular for decorative soaps.
You can create:
- Cupcake soaps
- Holiday-themed soaps
- Layered designs
- Embedded shapes
- Swirls and color patterns
It’s a great medium for:
- Christmas
- Halloween
- Easter
- Mother’s Day
- Father’s Day
- Birthday favors
If you’ve ever seen soap that looks like a dessert or holiday decoration, chances are it was melt and pour.
Is Melt and Pour Good for Beginners?
Absolutely.
If your goal is to:
- Explore creativity
- Avoid handling lye
- Make quick gifts
- Teach children
- Experiment with design
Melt and pour is a fantastic starting point.
If your goal is:
- Full ingredient control
- Traditional soap crafting
- Formulating oil profiles
- Creating truly custom bars
Then cold process soap making is the next step.
Final Thoughts
Melt and pour soap is a tool — not a shortcut, not a compromise, and not the same as cold process. It simply serves a different purpose.
The key is understanding what you’re buying, reading your ingredient labels, and choosing the type of soap making that fits your goals.
Soap making is both creativity and chemistry. Whether you start with melt and pour or dive straight into cold process, the important thing is learning the craft and enjoying the process.
Here is the link to a book that has some really nice Melt and Pour Recipes
📌 Next Step:
If you’re ready to move beyond pre-made bases and formulate your own soap from scratch, read my complete Cold Process Soap Making Guide.
Important Note:
This information is for educational purposes only.
This post may contain affiliate links. If you make a purchase through these links, I may earn a small commission at no extra cost to you.
Updated Feb 2026
© 2017 – 2026, Tes. All rights reserved.
can I use beer in my melt and pour soap making ?
Melt and pour is simply that. You melt and pour into molds, nothing else is required other than color and scent. I would not add any other liquid or your melt and pour will not set up well.