
Have you ever wanted to learn how to make cold process soap at home but weren’t quite sure where to begin?
Making your own soap from scratch is a wonderful skill to learn. You get to choose the oils, fragrances, and other ingredients, and there’s something especially satisfying about cutting a fresh batch of homemade soap into bars.
I’ve been making cold process soap for many years, including batches for markets and craft fairs. Over that time, I’ve learned that good soap making comes down to accurate measurements, patience, and understanding what happens at each stage.
Today, I’m taking you through one of my own soap-making sessions, using a simple tea tree soap without added colors.
All the step-by-step photographs in this tutorial are from my own soap-making process, so you can see what the ingredients and soap batter actually look like as we go along.
If you’re completely new to soap making, you may also want to read my Cold Process Soap Making Beginner’s Guide, which explains the ingredients, equipment, and chemistry behind making soap.
What Is Cold Process Soap?
Cold process soap is made by combining oils or fats with a solution of sodium hydroxide (lye) and water.
When these ingredients are mixed, a chemical reaction called saponification takes place. This reaction turns the oils and lye into soap and naturally occurring glycerin.
Despite its name, cold process soap making often involves warming the oils before combining them with the lye solution.
The method is called cold process because the soap batter is not cooked after mixing, unlike hot process soap.
One of the biggest advantages of making cold process soap is being able to choose your ingredients. Different oils contribute different qualities, including hardness, lather, cleansing ability, and conditioning.
If you’d like to understand how those ingredients work together, my guide to Soap Making Oils is a good place to explore.
My Cold Process Soap Recipe
For this tutorial, I’m making a batch of tea tree soap using olive oil, coconut oil, palm kernel oil, and palm oil.
This is a larger batch, similar to the size I make when preparing soap for craft fairs.
Oils
- 1800 grams olive oil
- 450 grams coconut oil
- 300 grams palm kernel oil
- 250 grams palm oil
Total oils: 2800 grams
Original Lye Solution
- 420 grams sodium hydroxide (lye)
- 1085 grams water
Important recipe verification: These are the measurements recorded in my original tutorial, not a newly verified formulation. Before making this batch, recalculate the sodium hydroxide using the exact oils, their specifications, and your chosen superfat percentage. Do not use the original lye amount without checking it.
You can learn how to check recipes in my guide to Using a Soap Lye Calculator Safely.
All ingredients, including water, should be weighed in grams for accuracy.
Tea Tree Essential Oil
For this particular batch, I’m using tea tree essential oil without any additional coloring.
I use one to 2 ounces of tea tree in this recipe.
You can also leave the batch unscented.
For more information about choosing fragrances, read What to Scent Soap With: Essential or Fragrance Oils.
Soap Making Supplies Needed
Before I start making soap, I like to have everything measured, organized, and ready to use.
Soap making moves along much more smoothly when you aren’t searching for a thermometer or spatula halfway through the process.
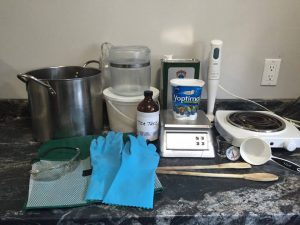
Safety Equipment
- Chemical splash goggles
- Chemical-resistant gloves
- Long sleeves and closed-toe shoes
- Protective apron
- Good ventilation
Soap Making Equipment
- Stainless steel stock pot
- Accurate digital scale
- Soap-making thermometer
- Stick blender
- Heat-resistant, lye-compatible containers
- Stainless steel or silicone stirring utensils
- Silicone spatula
- Soap mold
- Freezer paper or suitable mold liner, if needed
- Hot plate or stove
I prefer a large stainless steel stock pot because it gives me plenty of room to combine the oils and lye solution without filling the pot too close to the top.
If you’re putting together your first soap-making kit, a reliable digital kitchen scale and stainless steel immersion blender are two useful pieces of equipment.
Keep all soap-making equipment separate from food preparation.
If you’re just getting started, a silicone soap loaf mold is another useful investment. Silicone molds make it easier to remove your finished soap without having to line a wooden mold with freezer paper.
Important Soap Making Safety Tips
Before we begin, let’s talk about working with lye.
Sodium hydroxide is essential for making traditional cold process soap, but it is also caustic and must be handled carefully.
Always wear your safety equipment when measuring lye, mixing the lye solution, and working with fresh soap batter.
I recommend having a dedicated pair of chemical splash goggles and chemical-resistant gloves for soap making. Choose protective equipment specifically suitable for working with sodium hydroxide, rather than ordinary household gloves or safety glasses.
Remember these important precautions:
- Always add lye to water, never water to lye.
- Work in a well-ventilated area.
- Use containers specifically suitable for sodium hydroxide and the heat generated when it dissolves.
- Avoid glass containers, including old Pyrex coffee pots, because thermal stress or damage can cause breakage.
- Never use aluminum utensils or containers.
- Keep children and pets away from the work area.
- Keep protective equipment on until your soap-making equipment has been safely cleaned.
If lye contacts your skin, immediately rinse the affected area with plenty of running water for at least 15 minutes. Do not try to neutralize it with vinegar. Seek medical advice for chemical burns. If lye gets into your eyes, begin flushing immediately and obtain emergency medical assistance.
For more information, read What to Do If You Get Lye on Your Skin.
How to Make Cold Process Soap Step by Step
Now that we have our supplies ready, it’s time to make soap.
These are the steps I follow when preparing my own batches.
Step 1: Prepare Your Workspace
I always begin by making sure my soap-making area is clean and organized.
I protect the work surface, gather my equipment, and put on my goggles, gloves, and apron before handling any lye.
I also make sure my soap mold is ready.
If you’re using a wooden mold, you may need to line it with freezer paper before pouring your soap.
My tutorial on How to Line a Soap Mold explains how to prepare a mold before making soap.
Step 2: Measure Your Soap-Making Oils
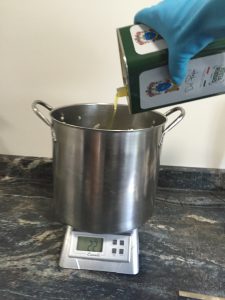
The first ingredients I measure are the oils.
For this batch, I’m using olive oil, coconut oil, palm kernel oil, and palm oil.
I start by weighing the solid oils using my digital scale.
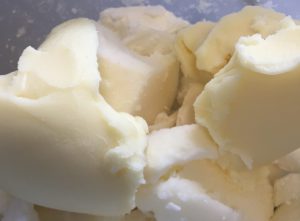
It’s important to weigh each ingredient accurately. Unlike ordinary cooking, soap-making depends on the correct relationship between the oils and sodium hydroxide.
I find it easiest to use the tare function on my digital scale, which allows me to reset the weight between ingredients.
A reliable digital kitchen scale is one of the most important tools for making soap. I recommend choosing one that measures in grams and has a tare function, so you can weigh your oils and other ingredients accurately.
Always double-check your measurements before continuing.
Step 3: Measure the Water and Lye Separately
Measure the sodium hydroxide by weight using a scale, and measure the water separately using a heat-safe container. Double-check measurements before moving on.
Never guess lye amounts — always follow a tested recipe or use a lye calculator.
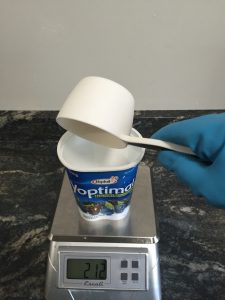
Before handling the lye, make sure your goggles and gloves are securely in place.
The exact quantity of sodium hydroxide must be calculated for the particular oils and amounts in your recipe.
Different oils require different amounts of lye to turn them into soap, which is why changing an oil without recalculating the recipe can cause problems.
If you’re unfamiliar with sodium hydroxide, my article on Lye in Soap Making explains what it is and why it’s necessary.
Step 4: Prepare the Lye Solution
This is the step where extra care is especially important.
Place your lye-compatible container in a stable, well-ventilated work area, ideally inside a suitable secondary container to help contain accidental spills.
Start with the measured distilled water already in the container.
Slowly add the measured sodium hydroxide to the water while stirring gently.
Never pour water onto dry sodium hydroxide.
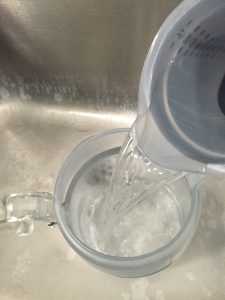
Water ready for lye
As the lye dissolves, the solution becomes very hot and may release irritating vapors.
Avoid leaning over the container or breathing the vapors.
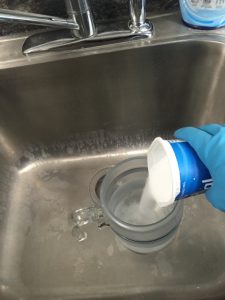
Slowly adding lye to water
Slowly add sodium hydroxide to the water and continue stirring until the sodium hydroxide has completely dissolved.
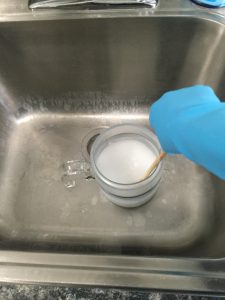
Stirring the lye and water until the sodium hydroxide is completely dissolved.
Once dissolved, leave the solution in a secure place to cool.
For this tutorial, I generally work with the lye solution at approximately 95–105°F (35–41°C).
The exact working temperature may vary depending on the recipe and ingredients.
Step 5: Heat and Cool the Oils
While the lye solution is cooling, I return to my pot of oils.
I use a hot plate to gently heat the oils until the solid ingredients have completely melted.
For this recipe, I generally warm the oils to around 120°F (49°C) before removing them from the heat.
Then I allow them to cool to approximately 95–105°F (35–41°C).
I like to have the oils and lye solution within a similar temperature range before combining them.
They don’t have to be exactly the same temperature, but working within a suitable range helps make the process more predictable.
While waiting for everything to cool, I make sure my mold is ready.
Step 6: Combine Oils and Lye Solution
Once the oils and lye solution have cooled to the desired temperature, it’s time to combine them.
I use my large stainless steel stock pot for this step.
Slowly pour the lye solution into the oils, stirring gently as you go.
At first, the mixture may look thin and oily.
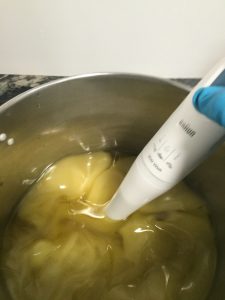 The lye solution has just been added to the measured soap-making oils.
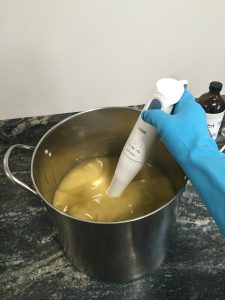
Once the mixture is combined, I switch to my stick blender.
Keep the blender head fully submerged and use short bursts, alternating with gentle hand stirring.
This helps prevent splashing and reduces the chance of incorporating too many air bubbles.
Step 7: Bring Soap to Trace
One of the most important stages of cold-process soap making is reaching trace.
Trace occurs when the soap batter has emulsified and thickened enough to leave a temporary mark on the surface when some batter is drizzled across it.
The consistency can range from a thin custard to a thick pudding.
For a simple soap like this one, I prefer a light to medium trace.
You can reach trace by stirring by hand, but it may take quite a while. I use a stick blender because it makes the process much faster.
If you plan to make soap regularly, a stainless steel immersion blender is worth having. I prefer one with a detachable blending shaft because it’s easier to clean after making soap. Use short bursts rather than blending continuously to avoid thickening the batter too quickly.
Be careful not to blend continuously for too long, as the soap can become thick before you’re ready to pour it.
If you’d like to see more examples, read my article What Is Trace in Soap Making?.
Step 8: Add Tea Tree Essential Oil
For this batch, I’ve decided to keep things simple.
I’m not adding any colors or decorative swirls. I’m using tea tree essential oil to give the soap its fragrance.
Once the batter has reached a suitable trace, I add the premeasured essential oil and stir thoroughly.
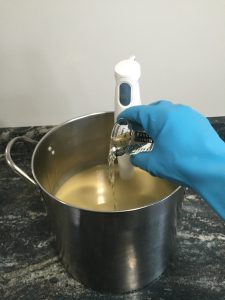
Step 9: Pour Soap Into the Mold
Once the essential oil has been thoroughly mixed into the soap batter, it’s time to pour.
By this stage, the soap should be thick enough to remain blended but still fluid enough to pour into the mold.
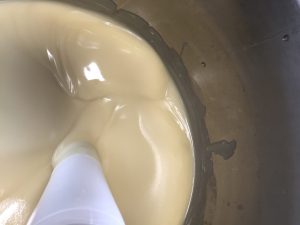
Slowly pour the soap batter into your mold.
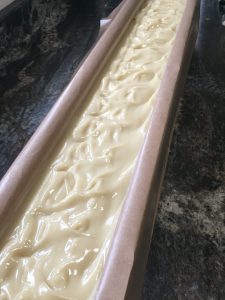
Gently tap the mold on the work surface to help release trapped air bubbles.
Try to spread the soap evenly so the finished bars will have a consistent shape.
Step 10: Cover and Let the Soap Rest
After pouring the soap, I allow it to rest undisturbed.
For this type of batch, I usually cover the mold with a piece of cardboard and then an old wool blanket.
This helps retain some of the heat produced during saponification.
However, not every soap recipe needs insulation. Recipes containing milk, honey, or other ingredients that encourage heating may become too hot if heavily insulated.
Watch for signs of overheating and adjust insulation according to your recipe and room temperature.
I usually leave my larger molds for approximately 48 hours before attempting to remove the soap.
Smaller batches may be ready sooner.
The important thing is to wait until the soap has cooled and is firm enough to unmold without damage.
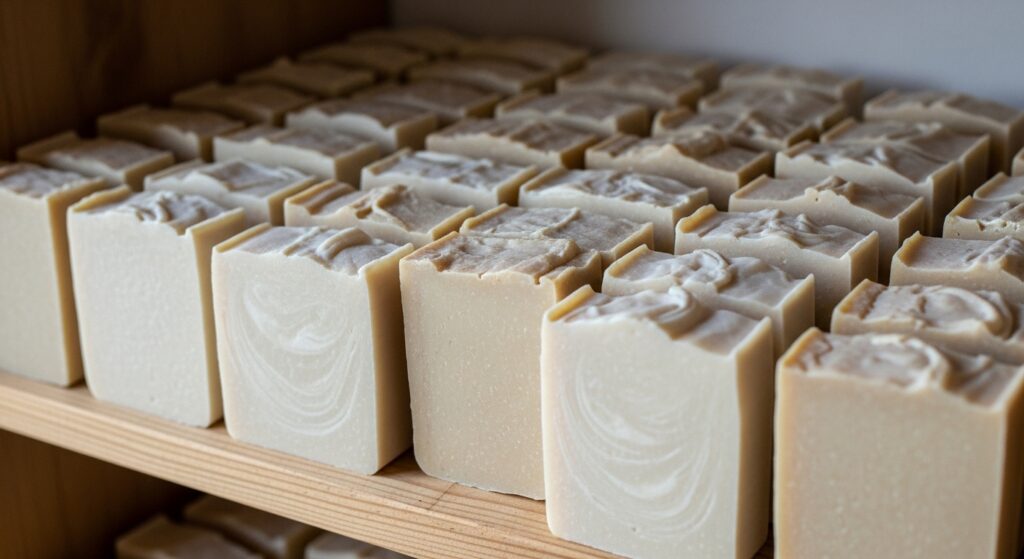
Step 11: Unmold, Cut, and Cure Your Soap
Once the soap has cooled and hardened sufficiently, I remove it from the mold.
Then I cut it into individual bars.
For small batches, a simple soap cutter works well. If you’re making larger batches or want more evenly sized bars, an adjustable soap cutter can make the job much easier. It’s especially useful when you’re making soap for gifts or craft fairs.
This is one of my favorite parts of soap-making. After all the measuring, mixing, and waiting, you finally get to see the finished bars.
But there’s one more important step before the soap is ready to use.
How Long Should Cold Process Soap Cure?
Most cold process soap benefits from approximately 4–6 weeks of curing.
During this time, excess water gradually evaporates and the soap becomes harder and longer-lasting.
I place my freshly cut bars on a curing rack in a cool, dry, well-ventilated area.
I also turn the bars occasionally so air can circulate around all sides.
For more information about curing and storing your finished bars, read my Handmade Soap Cure Guide.
Common Beginner Soap Making Mistakes
Even experienced soap makers occasionally have batches that don’t turn out exactly as expected.
Here are a few common mistakes to watch for.
Measuring Ingredients Incorrectly
Always weigh your ingredients rather than estimating quantities with measuring cups.
This is particularly important when measuring sodium hydroxide.
Changing Oils Without Recalculating Lye
Different oils have different saponification values.
If you substitute an oil, recalculate the recipe before making soap.
Using Too Much Fragrance
Essential oils and fragrance oils have recommended usage limits.
Adding more fragrance doesn’t necessarily create better soap and may cause irritation or problems with the finished batch.
Blending the Soap Too Long
A stick blender can bring soap to trace quickly.
If you blend too long, the batter may become difficult to pour.
Cutting Soap Too Soon
If your soap is still soft or warm, give it more time in the mold.
Cutting too early can cause bars to lose their shape.
Not Allowing Enough Curing Time
Even when a batch has completed saponification, it usually benefits from several weeks of curing.
Proper curing helps produce harder, longer-lasting bars.
Cold Process Soap Making FAQ
Is Cold Process Soap Making Difficult for Beginners?
Cold process soap making is a skill that beginners can learn with careful preparation, accurate measurements, and appropriate safety equipment.
Start by understanding the ingredients and working through each step before attempting more complicated recipes.
Can I Make Cold Process Soap Without Lye?
Traditional cold process soap requires sodium hydroxide.
If you want to make soap without personally handling lye, melt-and-pour soap bases are another option. The lye has already been used during their manufacture.
How Long Does It Take to Make Cold Process Soap?
The measuring, mixing, and pouring process often takes one to two hours, depending on your experience and recipe.
The soap generally remains in the mold for approximately 24–48 hours before cutting, followed by several weeks of curing.
Why Is My Cold Process Soap Soft?
Soft soap can result from a recipe containing a high proportion of liquid oils, excess water, insufficient curing time, or measurement problems.
Check the recipe and allow adequate time before deciding whether a batch has failed.
Can I Use Different Oils in This Recipe?
Yes, but you must recalculate the sodium hydroxide whenever you change the types or quantities of oils.
Even oils that appear similar can have different saponification values.
Do I Need a Stick Blender to Make Soap?
No. Cold process soap can be made by hand stirring, but reaching trace may take considerably longer.
A stick blender makes the process easier and more efficient.
How Do I Know When My Soap Is Safe to Use?
A correctly formulated recipe, accurate measurements, complete saponification, and appropriate quality checks are essential.
Curing alone does not correct excess lye, and a pH strip by itself cannot reliably confirm that a soap is free of excess sodium hydroxide.
Final Thoughts
Learning how to make cold process soap is a rewarding experience, especially when you get to use a bar that you’ve made entirely from scratch.
I’ve made many batches over the years, and I still enjoy the process of measuring the oils, blending the soap, and seeing the finished bars come out of the mold.
Whether you’re making soap for yourself, giving it as gifts, or eventually preparing batches for craft fairs, the important thing is to start with a properly calculated recipe, follow good safety practices, and give your soap the time it needs to cure.
Once you’ve mastered a basic batch, you can begin experimenting with different oils, fragrances, colors, and designs.
And that’s where soap making becomes especially enjoyable.
Important Note: This tutorial is provided for educational purposes. Always independently verify soap recipes and fragrance usage rates, and follow appropriate chemical safety procedures.
This post may contain affiliate links. If you make a purchase through these links, I may earn a small commission at no extra cost to you.
updated Nov 2026
I am very impressed with the details of the instructions. The pictures are very helpful in what seems like a tedious process. I also love the soothing lavender color that occupies the header. I instantly thought of lavender soap which is extremely appropriate!! Keep up the good work!
thanks for the lovely comments
This is very interesting and even though I have never even thought of making my own soap before, your post is detailed enough that I could probably try making my first soap bar. But did I miss something, I am just unsure what lye means/is? And I guess you can add scent you want? Oh can you make it smells like candy?! Thanks for the info.
Hi Summerly,
Lye is also known as Sodium Hydroxide. It is essential to soap making as the lye/water solution when mixed with the oils creates a reaction called saponification. Here is a link for some more detailed information for you http://makingsoapnaturally.com/lye-soap-making You can add whatever scent you choose, that would be added at trace. There are many scents out there including candy.
Hi, great tips on how to make your own soap. I did it once in chemistry lab and remember that it was a long process. Just a question, where do you find your ingredients? I can’t find sodium hydroxide at our chemist, is there somewhere specific you find it?
It’s very clear instructions, you make it sound easy. Thanks for the info!
Hello Ninene, I get my ingredients from different suppliers depending on what I am ordering. As for the sodium hydroxide. You can get it at most Hardware stores, but I’m not sure it is the same quality as the sodium hydroxide that the soap supply stores offer. Most suppliers of soap and candle making supplies will be able to sell you sodium hydroxide. However they can not ship it via mail, when I order mine it comes via greyhound. I hope this helps to answer your question. Thanks for stopping by my site.
I LOVE THIS POST! I’m always looking for fun new ways to work with natural body products. I use to make my own lotions but I’ve never made my own soaps. Do you make them for yourself? Or do you sell them? I’d really love to try your method. Thank you so much for sharing this recipe!
Hi GerraeLove, I have been making my own soap for many years and I also sell them at Farmer’s Markets, Craft Fairs and Retail outlets. It started as a necessity due to skin problems, but then into a labour of love. You can find some of my products here My Natural Handmade Soaps
Great instructions. Very detailed and the pictures were a bonus. I love natural soap but always felt like it would be an overwhelming process to produce my own. Your instructions made me feel a little more confident about making my own soap. It’s great that you have links to the supplies as well. Thanks.
Hello Tugarcia, I’m glad this article gave you more confident in making soap. It’s so nice to have your own natural soap, and knowing what you are putting on your skin.
Hi Teresa. I was wondering if you can leave out certain oils. I’d only like to use a few instead of all of them. Will it harden the same? What are your thoughts. Thanks.
Laura
Hi Laura,
You can use whatever oils your would like for making soap. I do one bar that just have Olive oil, so yes you can. Here is a list of soap making oils you can look at and a link to the Olive oil soap recipe.
The top 10 Soap Making Oils
Castile Soap (Olive Oil) Recipe
Hello. That was a great article. But, how about if I add some tomato extract or papaya, do I just add it together with the essential oil? Thanks in advance.
For extracts, the general rule is to add 1 tsp of extract per lb of oils. Extracts are usually one of the last additions before pouring your soap into the mold. I have found adding them at light trace is best.