Suffering from Eczema most of my life I began making my own soap when I was in my twenties. It took a long time of testing and trying before I came up with some recipes that really worked well for me.
Natural soap recipes are by far the best!
Soap made with skin loving oils will help to keep your skin moisturized, which in my case I found to be half the battle with the eczema.
In the winter where we live, the air is dry and it saps the moisture out of your skin, making it that much more important to make sure you use a bar of soap that will moisturize your skin rather than dry it out even more.
The more dry my skin was the more irritated it became and it seemed my outbreaks were way worse.
The recipe I use most is an Olive Oil, Coconut and Palm Blend
- 1800 Grams Olive Oil
- 450 Grams Coconut Oil
- 300 Grams Palm Kernal Oil
- 250 Grams Palm Oil
- 250 Grams Grapeseed Oil
- 420 Grams Lye (Sodium Hydroxide)
- 4.5 Cups Water
I have 4 basic recipes that I have created and used over the years of soap making. You can find them here Soap Making Recipes
I have also created a page with step by step instructions for making soap with pictures. You can find this page here How to make soap the cold process way with step by step instructions and pictures
Basic Soap Making Recipes
Making and using natural soap and keeping my skin hydrated really helped to slow down my outbreaks. Of course I started making my own laundry soap as well and learned what I could and could not eat.
Here is a link to some basic soap making recipes to get you started.
Basic Cold Process Soap Making Instructions
Before starting gather all the equipment and ingredients you will need for you soap
Mixing your ingredients:
- Put on your protective clothing, apron, safety goggles, gloves etc
- Measure your water and pour it into the container you will be using for your lye/water mix
- Measure out your lye (sodium hydroxide)
- Slowly add the lye to the water, stirring to be sure it mixes well. This should be done in a well ventilated area as the fumes can be quite strong. This will only last for a 15 seconds or so. Stir until the lye is completely dissolved in the water. It will heat up to about 180 degrees and can now be put aside to cool down.
- While the lye/water is cooling use a scale and measure each of your soap oils and put into your stainless steel pot.
- Place this pot on your stove or hot plate and turn on low to heat to approximately 130 degrees.
- Once the oils have heated to 130 degrees take off the stove or hot plate and let them cool down to about 100 degrees.
- When the lye/water mix and the oils are both cooled down to about 100 degrees they are ready to be mixed.
- Slowly add the lye/water mix to your soap oils and stir you can use a stick blender and hand mix. Mix the soap until it traces. This is when the soap begins to thicken; you can test this by using your spoon to drizzle the liquid into the pot. You will see a trace that stays on the surface of the soap mixture.
- Once the soap has traced this is the time to add your scent and color.
- Mix the scent and color in well
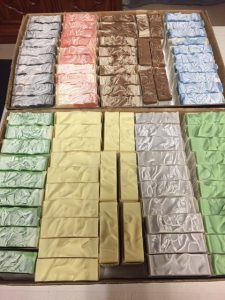
- Pour this mixture into the lined molds, cover with a piece of cardboard or plastic, put it to bed (place a blanket over the soap mold) and let set for a day or two.
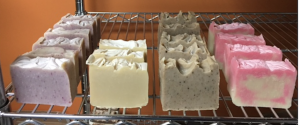
- Once it has sit for a day or two, remove the soap from the mold and cut and put out to cure for 4 to 6 weeks.
© 2017 – 2019, Tes. All rights reserved.