
If you love handmade body care, you probably know that cold process soap is where art and chemistry come together. Swirl patterns in natural soaps bring a personal touch to every single bar, and the best part is you can make eye-catching designs even if you’re brand new. This guide shares my favorite tips, techniques, and easy ideas to help you craft some next-level cool swirls in homemade cold process soap.
Introduction: Where Art Meets Chemistry
If you love handmade body care, cold process soap is the perfect blend of art and science. Swirl patterns give each bar its own personality — no two designs are ever alike. Even beginners can master eye-catching swirls with a little guidance. This step-by-step guide walks you through techniques, tools, and color ideas to help you craft naturally beautiful soap with stunning designs.
Why Swirl Patterns Make Cold Process Soap Special
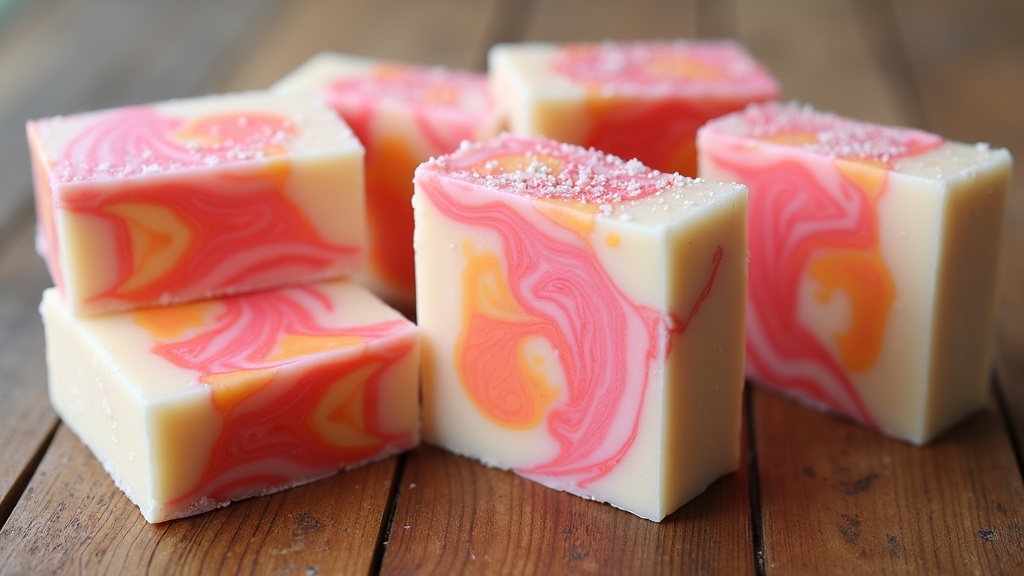
Swirls turn an ordinary soap bar into a work of art. Beyond their visual appeal, they highlight your natural colorants, essential oils, and creative flair. Every batch is unique — sometimes even the “happy accidents” look incredible.
Whether you prefer bold, dramatic contrasts or soft, marbled tones, swirl designs make soapmaking fun and deeply personal.
How to Make Swirls in Homemade Soap: Step-by-Step
Creating gorgeous swirls starts with getting your soap batter to the right consistency — smooth and pourable like pancake batter.
-
Mix Oils and Lye Solution: Allow both to cool to about 100–120°F. Blend until light trace (when the mixture drizzles and leaves a faint trail).
-
Divide the Batter: Split it into separate bowls for each color you’ll use.
-
Add Natural Colorants: Stir your color powders or clays until fully blended.
-
Pour into the Mold: Alternate or layer colors depending on your swirl style.
-
Swirl Away: Use a spatula, skewer, or hanger tool to create loops, figure-eights, or “S” patterns.
-
Insulate and Cure: Cover and let your soap harden for 24–48 hours before unmolding.
💡 Tip: Try the In-the-Pot Swirl for effortless marble effects, or use a hanger swirl for dramatic wave
The Best Temperatures for Swirling Cold Process Soap
Getting just the right temperature will help you nail your swirl designs. I’ve found that working in the 100-120°F range makes the soap batter flow easily and gives you time to create patterns. If it gets too cool, it thickens quickly and swirling becomes tough. Too hot, on the other hand, and you risk your fragrance or colors misbehaving. So stick with 100-120°F as a safe bet for most recipes.
Remember, this temperature guideline is only for cold process soap. Melt and pour soap is different. For melt and pour soap, you work at slightly higher temperatures, usually between 120°F and 135°F. Avoid letting it boil—just melt it smooth, then pour and swirl. Handle it gently for the best color effects.
Bringing Cool Colors and Sparkle Into Your Soap
Making your bars stand out with color is one of the joys of soapmaking. If you want to avoid synthetic chemical colors, there’s a world of natural options for soap swirling. Here are some favorites you might want to track down:
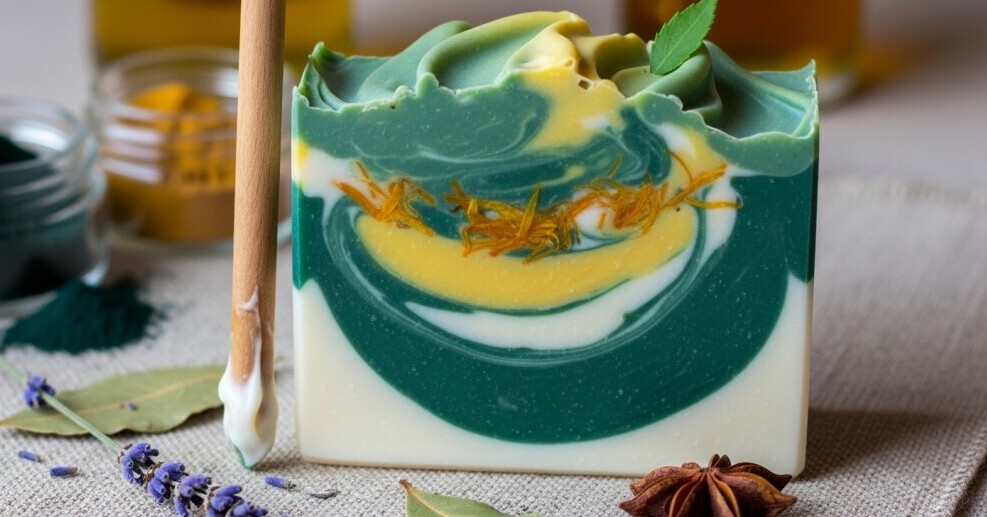
- Clays: French green, rose, or kaolin clays work well for gentle earthy colors.
- Spices: Turmeric gives golden yellow, paprika brings out a peachy orange, and spirulina makes a green shade.
- Botanical powders: Alkanet root (for purple), madder root (for pink), and indigo (for bluegrey) all add bold natural tones.
To add some next-level cool sparkle, toss in ground oats for a touch of texture, poppy seeds for dotted looks, or give a light dusting of shimmering mica on top. Just a little shimmer can really make your swirl patterns pop.
For bright colors and smooth swirls, pre-mix your powder with a small amount of oil or water before adding it to your soap batter. This keeps clumps away and helps your swirls look sharp after the soap sets.
💡 Pro Tip: Premix colorants with a little oil or water before adding to prevent clumps.
Choosing Essential Oils for Scent, and Oils to Avoid
Essential oils are a natural favorite for scenting homemade soaps. But not every essential oil is good for the skin or safe to use in cold process recipes. Here are some scents I often reach for:
- Lavender: Gentle and uplifting.
- Sweet orange: Has a happy citrus scent (use a stable version made for cold process).
- Peppermint: Refreshing, but remember to use lightly since it can be punchy.
- Eucalyptus: Crisp and clean-smelling.
- Cedarwood or patchouli: Perfect for a warm, earthy kick.
Some essential oils are best left out of your soapmaking toolkit:
- Wintergreen and camphor: Risky in higher amounts, can be toxic—avoid using them.
- Clove and cinnamon leaf or bark: Skin irritants, especially for soap left on your skin.
- Some citrus oils: Lemon, lime, and bergamot (unless treated) may cause sun sensitivity.
- Pennyroyal, wormwood, mustard, and sassafras: Not safe for skin contact, so don’t use them in soap.
It always pays to check a trusted reference or IFRA safety guidelines before putting a new oil in your recipe. If in doubt, spottest a tiny batch and see how your skin reacts.
Top Swirl Techniques Every Beginner Should Try
- In the pot Swirl: Pour separate colors into your main soap pot with just a few gentle swirls, then pour into the mold for spontaneous marbling.
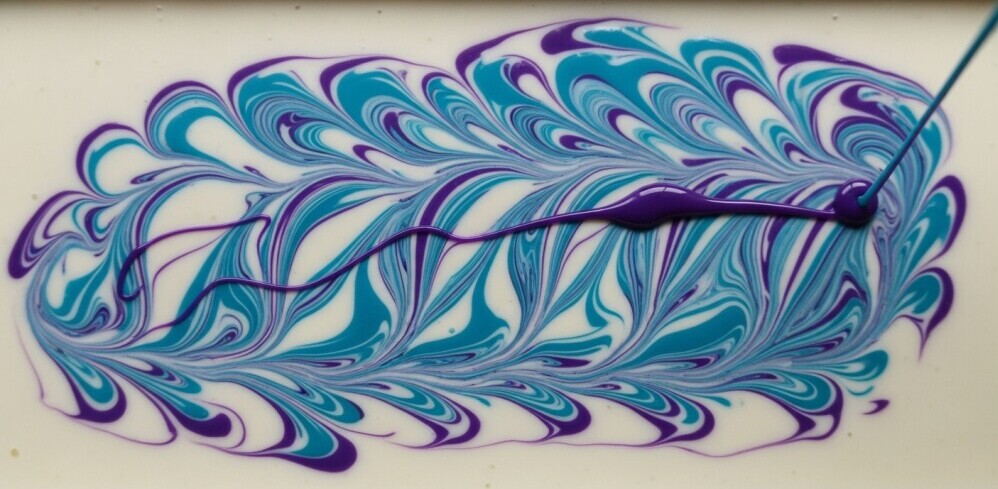
- Drop Swirl: Drop thin streams of colored soap over a base layer; the colors fall through, making soft, random lines.
- Hanger Swirl: Take a bent wire or simple tool, and swirl it through the soap in several directions to create curvy, wavy flows.
- Chopstick or Skewer Swirl: Drag a stick or skewer across just the top layer for gentle, wispy swirls.
- Layered Swirl: Pour colored layers one at a time, then swirl the top for high-contrast stripes and bold effects.
If you’re a beginner, start with an inthepot or drop swirl since they’re forgiving even if the soap thickens quickly. Chopstick or hanger swirls need a bit more patience, but you’ll see your artistry grow with every try. Don’t be afraid to switch things up with new colors or techniques each time—the wild you get, the better the results.
Common Troubleshooting Tips for Swirling Soap
- Soap batter thickened too quickly? Favor recipes with more olive oil, less hard butter. Fragrance and some essential oils can accelerate trace, so use them sparingly and slowly mix them in.
- Colors blending instead of swirling? Stop mixing as soon as you start pouring the colors. Overmixing creates muddier patterns instead of crisp lines.
- Swirls sinking to the bottom? That usually means your batter is too thin or too thick. Aim for a light-tomedium trace for the best results.
- Design not appearing after cutting? Pick bolder, high-contrast colors and swirl with gusto through thicker batter if you want your design to show up more clearly.
Wrapping Up: Why Swirling Cold Process Soap Is Worth the Mess
Jumping into swirling natural cold process soap is as much about having a blast as it is about getting a great-looking bar. Most of what I’ve learned came from happy accidents and experiments—and plenty of soapy messes! Even when your swirls don’t go as planned, you end up with bars that are totally oneofakind. Make safety your priority, pick essential oils that are gentle on skin, and don’t be afraid to play around with colors or temperatures. Your swirl artistry will only get better with every batch you mix up.
Soap Swirling FAQ
Question: How do I get more than two colors in my swirl?
Answer: Divide your batter into as many bowls as you want colors, then pour and swirl each one. Keep your color layers thinner to stop them from getting muddy together.
Question: Do I need special tools for swirling?
Answer: Not at all. A regular kitchen skewer, the handle of a spoon, or a bent wire hanger works just fine for most designs.
Question: How can I make my swirls pop out more?
Answer: Use colors that stand out from each other and don’t be shy when swirling—go bold with your tool to achieve distinct, eye-catching patterns!
© 2025 – 2026, Tes. All rights reserved.