Why In-the-Pot Swirling Makes Cold Process Soap Magical
In-the-pot swirling (ITP) is one of the most popular cold process soap designs because it’s elegant, versatile, and beginner-friendly. Each swirl captures movement and color in a way no two bars ever replicate. The technique looks intricate but relies on timing, temperature, and a steady hand—not professional tools.
By learning how to control trace, color density, and pour height, you can produce beautifully marbled soaps that look like they came from an artisan studio.
Essential Materials
Before you begin, gather everything you’ll need:
- Protective gear: gloves, goggles, and long sleeves
- Soap base oils: olive, coconut, palm, or your preferred recipe
- Lye solution: sodium hydroxide mixed safely with distilled water
- Fragrance or essential oil (ensure it behaves well in cold process)
- Mica or oxide colorants pre-mixed in lightweight oils
- Heat-resistant containers for dividing soap batter
- Rubber spatula and bamboo skewer for swirling
- Mold: loaf mold works best for this technique
- Rubbing alcohol (91%) to prevent soda ash
💡 Pro Tip: Choose a fragrance that doesn’t accelerate trace. Slow-moving scents give you time to swirl gracefully.
Step-by-Step: The In-the-Pot Swirl Technique
Step 1: Reach Light Trace
Mix your lye water into melted oils and blend until you reach a light trace—similar to thin cake batter. This consistency allows your colors to move and merge naturally without thick clumping.
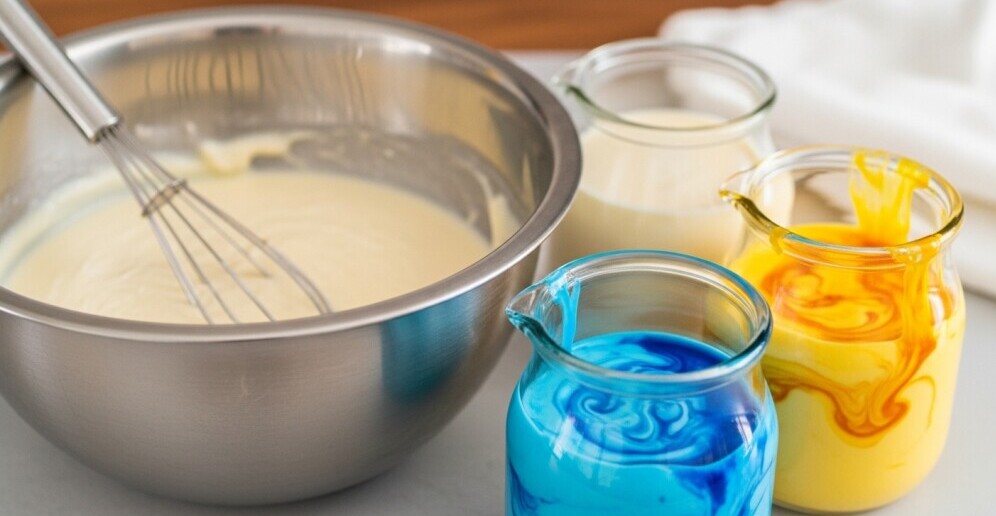
Step 2: Divide and Color
Separate your soap batter into smaller containers.
- For two-color swirls, pour ¼ – ½ of the batter into two jugs.
- Add pre-mixed colorants and stir gently. Avoid over-blending—thin is best.
Step 3: Pour the Colors Back
Return the colored soap to the main pot in four locations:
- First color at 12 o’clock and 6 o’clock
- Second color at 3 o’clock and 9 o’clock
Pour from high above so the color penetrates deep into the batter.
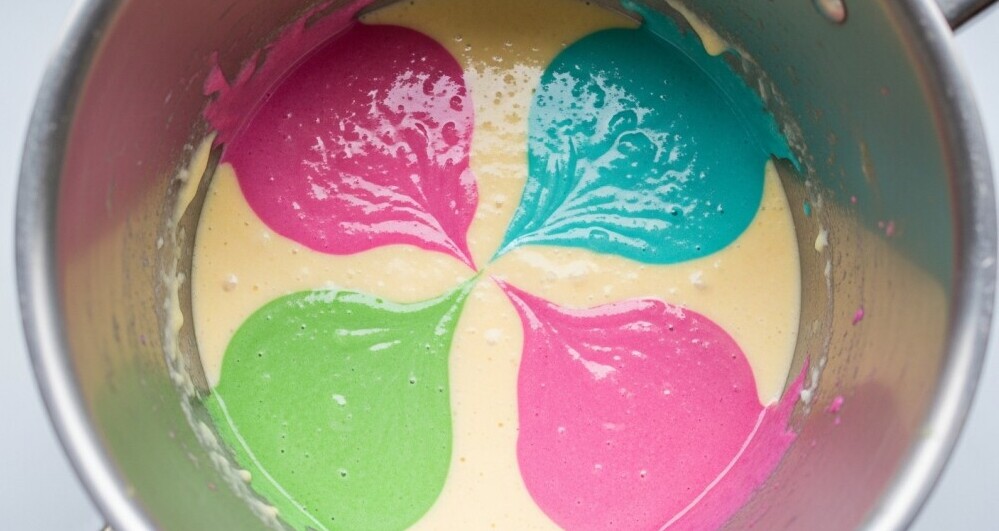
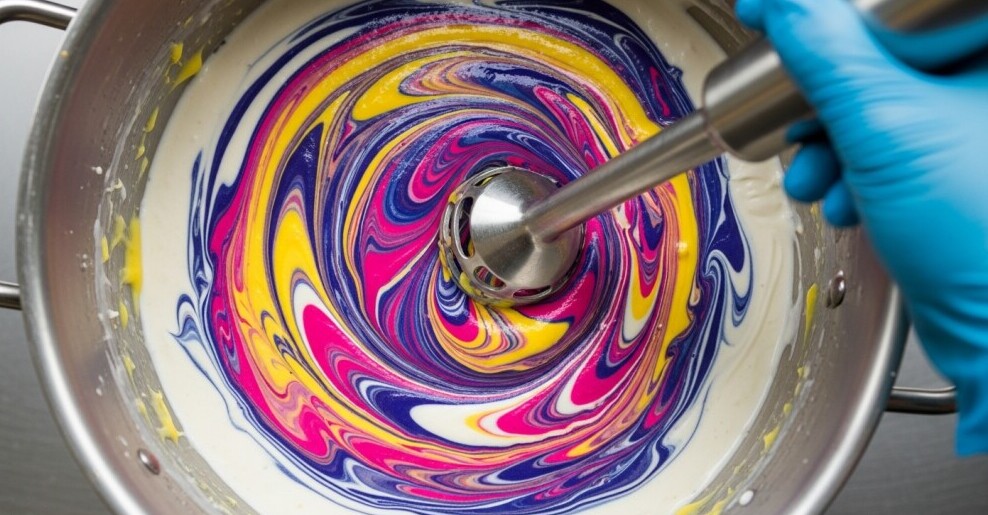
Step 4: Swirl Once
Use a spatula or chopstick to make one gentle clockwise swirl through the pot. Resist the urge to over-mix—this single turn gives your design motion without muddying the hues.
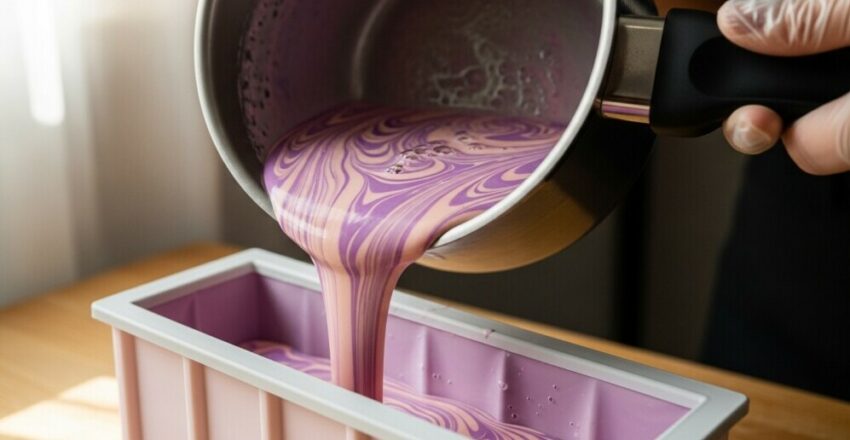
Step 5: Pour Into the Mold
Pour slowly into your loaf mold from one end to the other. Watch as ribbons of color fold over each other, forming natural marble-like waves. Tap the mold lightly to release air bubbles.

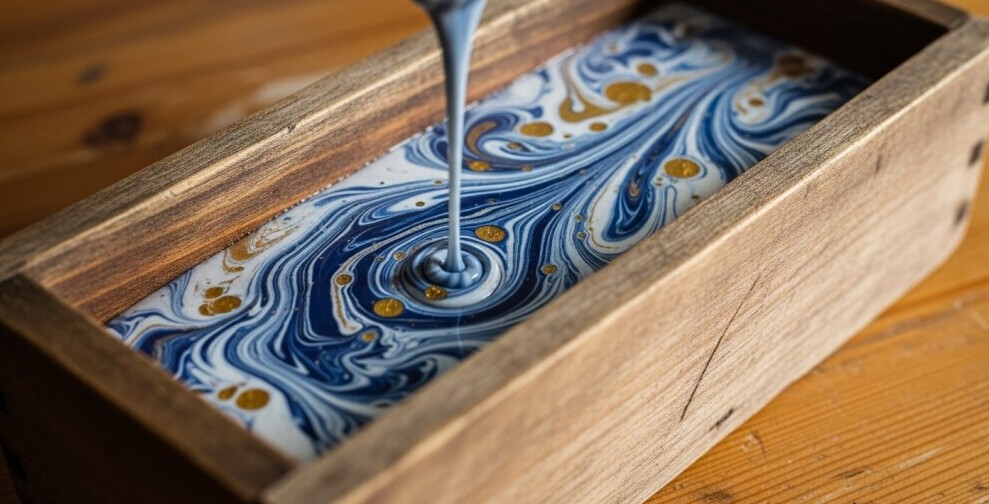
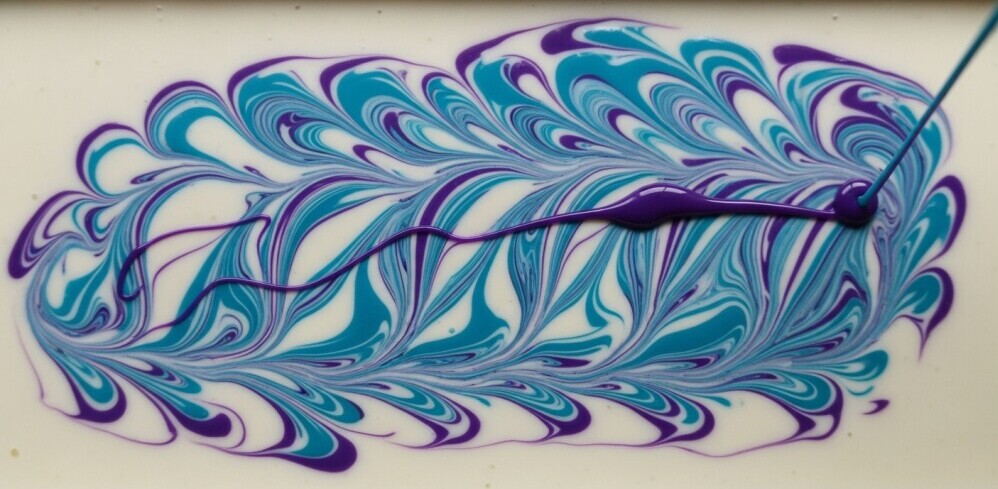
Step 6: Add a Surface Swirl
With leftover colored soap, drizzle fine lines across the top. Use a skewer to draw figure-eights or S-curves. This adds depth and dimension to your finished bar.
Step 7: Insulate and Cure
Spritz the top with rubbing alcohol, cover with cardboard, and wrap with a towel. Allow it to rest 24 – 48 hours before unmolding and cutting.
Let your soap cure 4 – 6 weeks for a hard, long-lasting bar.
Tips for Perfect Swirls Every Time
- Temperature: Keep lye and oils around 100 °F for longer working time.
- Oil ratio: Use 60 % or more liquid oils to slow trace and maintain fluidity.
- Color testing: Oxides stay truer than some micas that morph in high pH.
- Texture control: Thick trace sinks, thin trace floats—combine both for layered effects.
- Avoid soda ash: Alcohol spritz + insulation = smooth finish.
Recommended Mold Choices
Mold Type Best Use Notes
Loaf Mold In-the-pot or two-color side-by-side pours Great depth for marbled effects
Slab Mold Surface or linear swirls Ideal for intricate top designs
Vertical Mold Simple layered color designs Not suited for linear swirling
Final Thoughts
Mastering the in-the-pot swirl is a rewarding way to blend color artistry with soap chemistry. Once you understand trace control and fragrance behavior, you can confidently experiment with more advanced techniques—like drop swirls, hanger swirls, or butterfly designs. Every swirl tells its own story, so keep notes and photos of your process for future inspiration.
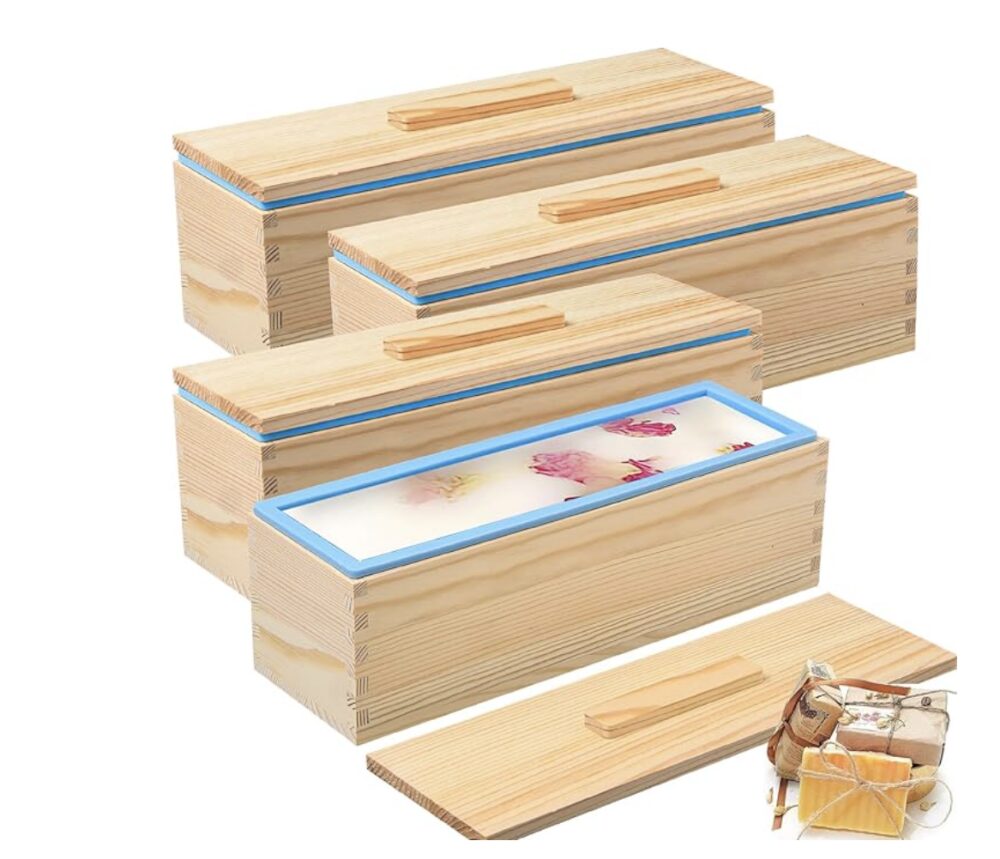 These mold can be found on Amazon – click the link to find these and more
© 2025 – 2026, Tes. All rights reserved.