
Layered Swirl: Adding Dimension to Cold Process Soap
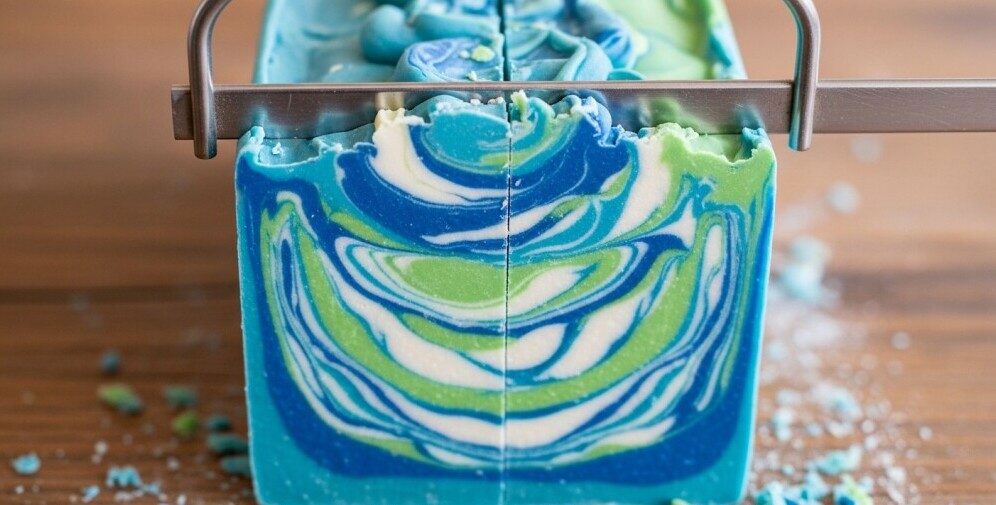
If you love artistic soaps that show off both color and texture, the Layered Swirl technique is a must-try. This design combines clean, defined layers with fluid swirls — giving each bar depth, contrast, and a truly handcrafted feel. Whether you’re going for bold color bands or soft marbled waves, layered swirls let you experiment creatively while keeping your design structure.
What Is a Layered Swirl?
The layered swirl involves pouring soap batter in stages to create multiple layers, each with a unique color or swirl pattern. Once a layer is poured and slightly set, another colored layer is added on top, often swirled gently to blend or left clean for a more distinct contrast.
This technique works beautifully for:
- Multicolored soaps with clear pattern separation
- Embedding mica lines or botanical powders between layers
- Creating ombré or gradient transitions
Supplies You’ll Need
- Pre-lined soap mold
- Prepared lye solution and oils
- Stick blender
- Rubber spatula or spoon
- Colorants or natural clays
- Fragrance or essential oils
- Divider or spoon for layering
- Chopstick, skewer, or thin spatula for swirling
Step-by-Step: How to Create a Layered Swirl Soap
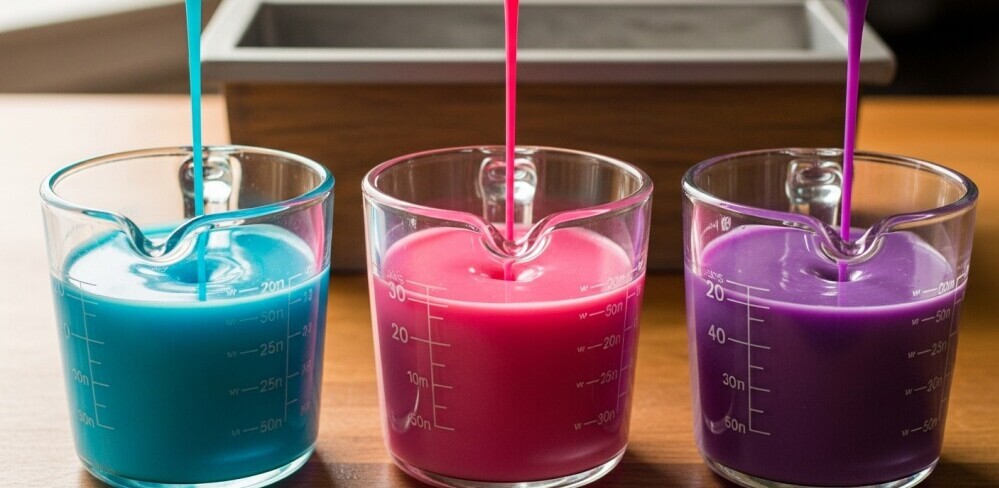
1. Prepare Your Soap Batter
Bring your oils and lye water to a light trace. Divide the batter into separate containers — one for each layer or color.
2. Color and Scent Each Portion
Add your chosen natural colorants (clays, herbs, or micas) and fragrance oils to each portion of soap batter.
3. Pour the First Layer
Pour the first layer into your mold and tap gently to remove air bubbles. Allow it to thicken slightly — firm but still warm to the touch.
4. Add the Next Layer
Carefully spoon or pour the next colored layer over the back of a spatula to avoid breaking through the base layer. For extra depth, drizzle small amounts of contrasting color on top before smoothing.
5. Swirl Between Layers (Optional)
Use a chopstick or skewer to lightly swirl the interface of two layers. Don’t overmix — the magic is in subtle movement!
6. Repeat for Remaining Layers
Continue layering and swirling as desired until all soap is poured. Finish with a decorative top swirl or textured finish.
7. Insulate and Cure
Cover and insulate for 24–48 hours. Unmold, cut, and let your soap cure for 4–6 weeks for the best hardness and longevity.
Tips for Perfect Layered Swirls
- Keep each layer at a medium trace to prevent bleeding.
- For crisp lines, let the layer set a few minutes longer before adding the next.
- Try contrasting shades or natural gradients — such as indigo to white kaolin, or rose clay to cocoa.
- A slow-moving fragrance oil gives you more time to pour and swirl neatly.
Color Ideas for Layered Swirl Soaps
ThemeColor Palette Add-Ins Ocean Breeze White, Aqua, NavySea clay, kelp powder Sunrise Citrus Yellow, Orange, Pink Turmeric, paprika, rose clay Woodland Calm Cream, Green, Brown French green clay, cocoa powder Lavender Fields Purple, Cream, Violet Alkanet root, lavender buds
Conclusion
The Layered Swirl is perfect if you love structure with artistry — every cut reveals new surprises! With practice, this method becomes a go-to for beautifully balanced soap bars that look as professional as they feel.
Experiment with colors, fragrances, and layer thickness — soon you’ll find your signature swirl style.
© 2025 – 2026, Tes. All rights reserved.