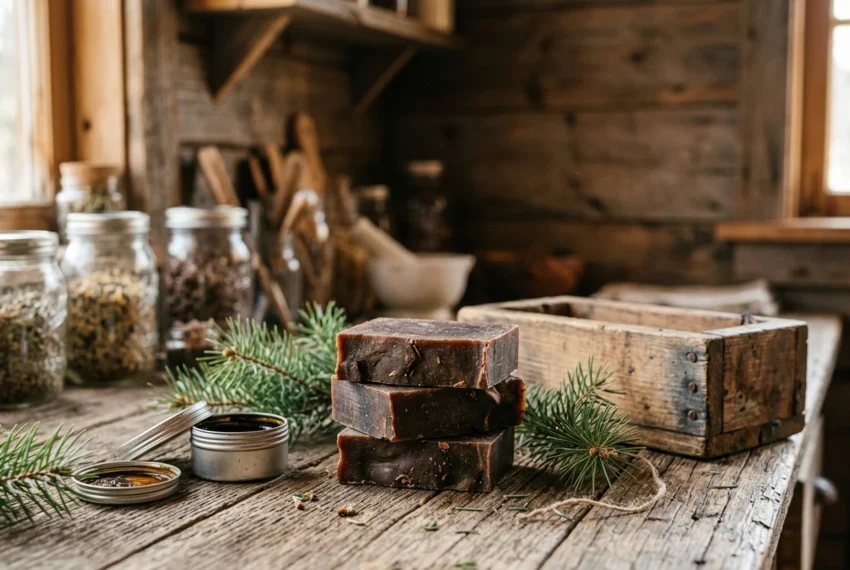
Pine tar soap is a cold process bar made with a small amount of pine tar, a dark, sticky, smoky-smelling byproduct of heating pine wood. It has a long history as a traditional soap, and many makers like it for its rustic scent and its reputation as a bar for hardworking skin. It is a specialty bar, and the pine tar changes how the batter behaves, how the bar smells, and what color it ends up.
This pine tar soap recipe is a one-batch cold process formula. It assumes you have already made a basic bar. If you want the full walkthrough of mixing lye water, combining it with oils and pouring, the tallow soap recipe on this site covers those steps in detail. Here the focus is on what changes when pine tar goes into the pot.
What pine tar soap is and why makers love it
Pine tar is a thick, dark brown to nearly black liquid, close to molasses in consistency but with a smell like a campfire or a freshly tarred rope. In soap it gives a mild smoky scent and a brown color that needs no added colorants.
Makers choose it for three main reasons:
- It is a traditional ingredient, used in soap long before synthetic fragrances and colorants existed.
- It colors and scents the bar by itself, so the recipe can stay simple.
- The finished bar has a distinctive rustic look that stands out at a market table.
A note on skin: pine tar soap is popular with people who like a traditional bar for everyday washing, but it is soap, not a treatment. Do a patch test on a small area before using it on your face or giving it away, because pine tar can bother sensitive skin.
Ingredients and equipment for the batch
This formula makes about 500 grams of oils, which fills a small loaf mold and yields roughly five to six bars.
Oils
- Olive oil: 225 g (45%)
- Coconut oil: 125 g (25%)
- Shea butter: 125 g (25%)
- Castor oil: 25 g (5%)
Other ingredients
- Pine tar: 20 g (4% of the oil weight)
- Sodium hydroxide (lye) and distilled water, in the amounts your lye calculator gives you
- Optional: essential oil, covered in the scent section below
Equipment
- A digital scale that reads in single grams
- Heat-safe containers for lye water and oils, plus a stainless steel or silicone spatula
- A stick blender
- A small jar and a bowl of hot tap water for warming the pine tar
- A lined loaf mold
- Safety goggles, long gloves and sleeves
Pine tar is sticky and stains. Use containers and utensils you are happy to dedicate to soap, and wipe up drips right away with paper towels.
Choosing your oils and running the numbers in a lye calculator
Olive oil makes up the bulk of this formula because it gives a gentle, conditioning bar. Coconut oil adds hardness and lather, shea butter adds a creamy feel and firmness, and castor oil supports a more stable lather. If you want to compare other options, the guide to soap making oils lists what each oil brings to a bar.
Enter your four oils and their weights into a lye calculator, set the superfat to 5%, and leave the water setting at the calculator’s default. Do not enter the pine tar as an oil. Take the lye and water amounts it gives you and weigh them exactly. If you have never used one, how to use a soap lye calculator safely explains each setting.
A 5% superfat leaves a small share of the oils unconverted into soap, which gives a margin of safety and a mild bar. Pine tar is a variable material and not every supplier’s product is the same, so keeping the superfat at 5% rather than dropping it to 0 to 2% is the sensible choice for this batch.
Step-by-step: mixing, adding the pine tar and reaching trace
Wear your goggles and gloves for every stage that involves lye. Mix and combine as you would for any cold process batch, then follow these pine tar specifics.
- Warm the pine tar first. Cold pine tar is stiff and hard to scrape out of its container. Stand the jar in a bowl of hot tap water for ten minutes or so until it pours easily, then weigh out 20 g into a small cup.
- Make the lye solution. Add the lye to the distilled water, never the reverse, stir until clear, and set it aside to cool.
- Melt the hard oils. Melt the coconut oil and shea butter, then add the olive and castor oils. Let the oils and the lye solution come down to a similar warm temperature, roughly body temperature to a little above.
- Combine and blend to light trace. Pour the lye solution into the oils and use the stick blender in short bursts, stirring in between. You want a thin trace, where the batter leaves a faint line on the surface. If trace is unfamiliar, what is trace in soap making shows what each stage looks like.
- Add the pine tar. Scoop a cup of the thin batter into the cup holding the pine tar and stir it until smooth with no tar clumps. Pour this mixture back into the main pot.
- Blend briefly. Give the pot a few short pulses with the stick blender, then stir by hand to check that the color is even.
Mixing the pine tar into a small amount of batter first matters because the tar is dense and sticky. If you drop it straight into a full pot, it can form stringy lumps that are hard to break up.
Pine tar can also speed up the batter, so do not take the batter to a thick trace before adding it. Light trace gives you the most working time.
Scent: working with the smoky smell, and whether to add essential oils
Raw pine tar smells strong, but the scent in the finished soap is milder than in the jar. In the pot it can fill a room, so work with the windows open.
You have two options:
- Leave it unscented. Many makers do, because the smoky, woody smell is the point of the bar. Over the cure it settles into a softer, warm campfire note.
- Add essential oil. A little can round out the smoke. Cedarwood and other woody oils sit comfortably beside it. Peppermint and eucalyptus give a sharper, fresher edge that some people like against the smoke. Sweet orange is bright and can read as odd next to pine tar, so try a small test batch first.
Keep any essential oil within safe usage rates. The essential oil dilution chart gives limits for soap, and stir the oil in after the pine tar is blended. Because the pine tar already contributes a lot of aroma, a light hand with additional scent usually smells better than a heavy one. For a sense of which scents sell, see best selling soap scents.
Pouring, cutting and the color to expect as it cures
Pour the batter into the lined mold and tap it gently on the counter to release air bubbles. Pine tar batter is already dark brown, so there is no point in elaborate swirls. A smooth top or a gentle texture made with the back of a spoon suits the bar.
Cover the mold and let the soap sit for 24 to 48 hours. It may warm up and go through gel phase, where the center turns translucent and darker. Gel phase will deepen the color, which is fine here.
Expect these colors:
- Fresh from the pot: a medium to dark chocolate brown, often with a slightly glossy surface.
- After unmolding: a deep brown, sometimes with lighter streaks where the batter did not gel.
- During cure: the bar may lighten a little toward a warm brown as it dries, and a thin pale film (soda ash) can appear on the top. You can plane or trim it off, or simply leave it, since it is cosmetic.
Cut the loaf into bars when it is firm enough to hold its shape, usually after a day or two. Since this recipe has a high share of olive oil and shea butter, it may be softer than a bar made mostly of hard fats, so give it a little longer before cutting if the loaf still dents under your thumb.
Cure time and how to tell the bar is ready
Set the bars on a rack or a sheet of parchment with space between them, somewhere dry with good airflow and out of direct sun. Turn them every week or so so all sides dry evenly.
Plan on a minimum of four weeks. Because of the high olive oil content, six weeks gives a harder, longer-lasting bar. The guide on how long handmade soap should cure explains the timeline in more detail.
You can tell the bar is ready when:
- It feels firm and does not dent when you press a thumb into it.
- It has lost weight. Weigh a bar once a week, and when the numbers stop dropping it has stopped losing water.
- The smell has mellowed from sharp tar to a softer, woody smoke.
- It lathers well and does not feel slimy.
If you are unsure about the pH of a finished bar, do not rely on a quick test strip alone. Wait out the full cure, and test a small piece by washing your hands before you use it daily.
Troubleshooting pine tar batches that seize, darken or separate
The batter seizes or thickens too fast. Pine tar and a warm batter can combine to thicken the pot quickly. Add the pine tar at light trace, mix it into a small portion of batter first, and avoid over-blending. If it has already thickened, stop blending, spoon it into the mold and tap out air pockets. The bar will be rougher on top but usable.
The soap is much darker than expected. The pine tar itself is nearly black, and gel phase deepens it. If you want a lighter brown, reduce the pine tar slightly, or keep the soap cooler to avoid full gel by placing the mold in a cool room. Note that a darker bar is not a sign of a failed batch.
Streaks or specks of tar appear. The pine tar was not fully dissolved in the batter. Warm it before weighing, stir it into a portion of batter until it is completely smooth, and then return it to the pot.
Oil beads or a liquid layer forms on top. This is separation. The usual causes are a mis-weighed lye or oil amount, or a batter that was never fully emulsified before pouring. Recheck your measurements on the scale and your calculator entries, and blend until the batter looks uniform before you add the pine tar. A separated batch can sometimes be rescued by rebatching, but if you are unsure that the lye amount was right, discard it safely.
The bar stays soft or sticky. Olive oil and shea make a gentler, softer bar. Give it extra cure time on a rack with airflow. If the next batch is still soft, raise the coconut oil share a little in the calculator.
Run the next batch with only one change at a time, such as a different pine tar amount, so you can see exactly what that change did to the batter and the bar.
© 2026, Tes. All rights reserved.