
Seizing is the point where soap batter goes from fluid to stiff in seconds, usually while you are still blending, pouring or adding fragrance. A batch that seizes can be saved in most cases, but the right rescue depends on how far it has gone. This guide shows how to fix a seized soap batch by working out which stage you are in, then matching the rescue to it and reading the clues for the cause.
One safety point applies to every stage. Seized batter is still raw, lye-containing soap, so keep your gloves and eye protection on until the batch is in the mold and covered, and again whenever you handle it afterwards.
What seizing looks like, and how it differs from normal trace
Normal trace is a gradual thickening. The batter moves from thin like milk to the consistency of thin pudding, and you have time to stir in color, pour into the mold, and swirl. The trace guide covers that behavior in detail, so this piece starts where trace goes wrong.
If you’re unsure what normal trace should look like, my guide to What Is Trace in Soap Making? explains the different stages and how to recognize them.
Seizing is trace that arrives too early or too fast. You may see one or more of these signs:
- The batter thickens abruptly after you add fragrance or essential oil, or after a few seconds of stick blending.
- It turns grainy or lumpy, like cottage cheese or wet mashed potato.
- The blender struggles, or the batter climbs up the shaft.
- The pot feels noticeably warm because the soap is saponifying quickly.
- The batter will not pour. It has to be scooped.
Two other conditions look similar. False trace happens when hard oils or butters begin to re-solidify in a cool batter, which makes it look thick. Gentle warming and stirring often loosens it, because the batter is still fluid underneath. Separation is a different problem. The oil and lye water have not combined, and the batter looks greasy or has liquid pooling on top.
Seizing does not loosen with warming. The thickness comes from fast saponification, not from solid fats, so the batter keeps stiffening however long you stir.
Stop and assess: three stages of a seized batch
Stop blending the moment the batter changes. Put the stick blender down, because every extra second of blending speeds the thickening. Then look at what is in the pot and judge which of three stages you are in.
Stage one: thick but scoopable. The batter is like thick pudding or frosting. It no longer pours, but it still falls off a spatula in a slow clump and levels a little in the mold. You have a few minutes.
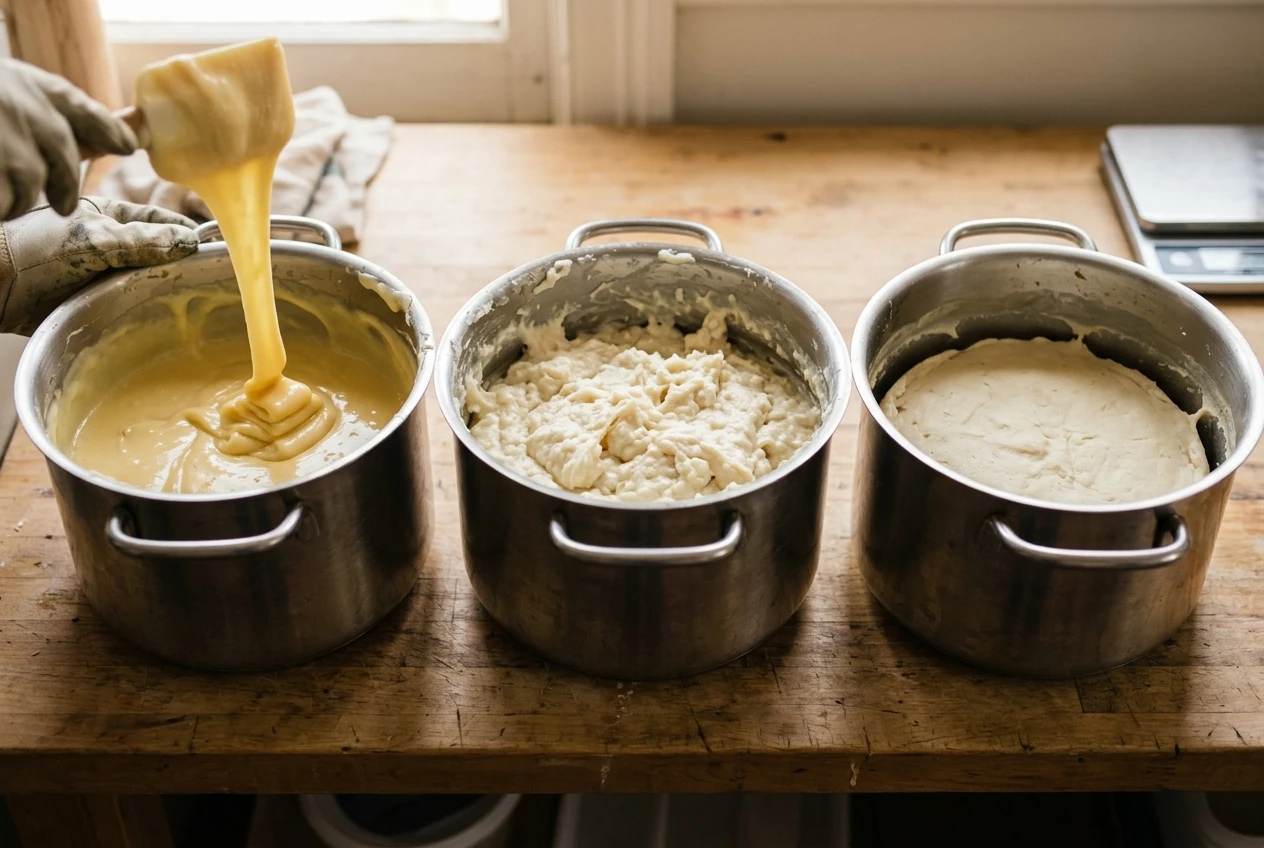
Stage two: clumpy and mounding. The batter has gone lumpy and holds peaks. It sits in a mound when you scoop it, and may look like curdled cheese or mashed potato. You have a minute or two, and the batter will need to be pressed into place.
Stage three: solid in the pot. The batter has stiffened into a mass that does not move and cannot be scooped cleanly. It may feel hot. At this point the mold is no longer an option, and the soap needs a different plan.
Decide quickly and have the mold ready. If the mold is lined and the spatulas are within reach, every stage gets easier.
Seizing isn’t the only problem that can happen during soap making. My Soap Making Problems and Troubleshooting Guide covers other common issues, including separation, crumbly bars, and problems with finished soap.
Rescue at stage one: thick but still scoopable batter
If the batter will still move, the aim is to get it into the mold before it stiffens further.
- Stir by hand with a spatula only enough to make the batter even. Do not use the stick blender again.
- Scoop or pour immediately into the lined mold. Use the spatula to push the batter into the corners.
- Abandon complicated designs. Elaborate swirls need fluid batter. Plan on a simple one-color bar, or a rough top.
- Tap the mold firmly on the counter several times to release air bubbles. Thick batter traps more air than thin batter.
- Texture the top. Use the back of a spoon to pull up peaks, which gives you a deliberate rustic finish instead of a lumpy surface you did not choose.
Cover the mold as you normally would. A seized batch often heats up faster than usual, so check it a couple of hours later. If it is getting very hot and the center is rising or cracking, move it to a cooler spot, or uncover it so it can release heat.
Stage one soap usually turns out as a perfectly usable bar. The main differences are air pockets and a less polished surface.
Rescue at stage two: clumpy, mounding batter that needs packing into the mold
At stage two the batter will not flow, so the job becomes packing it into the mold like dough.
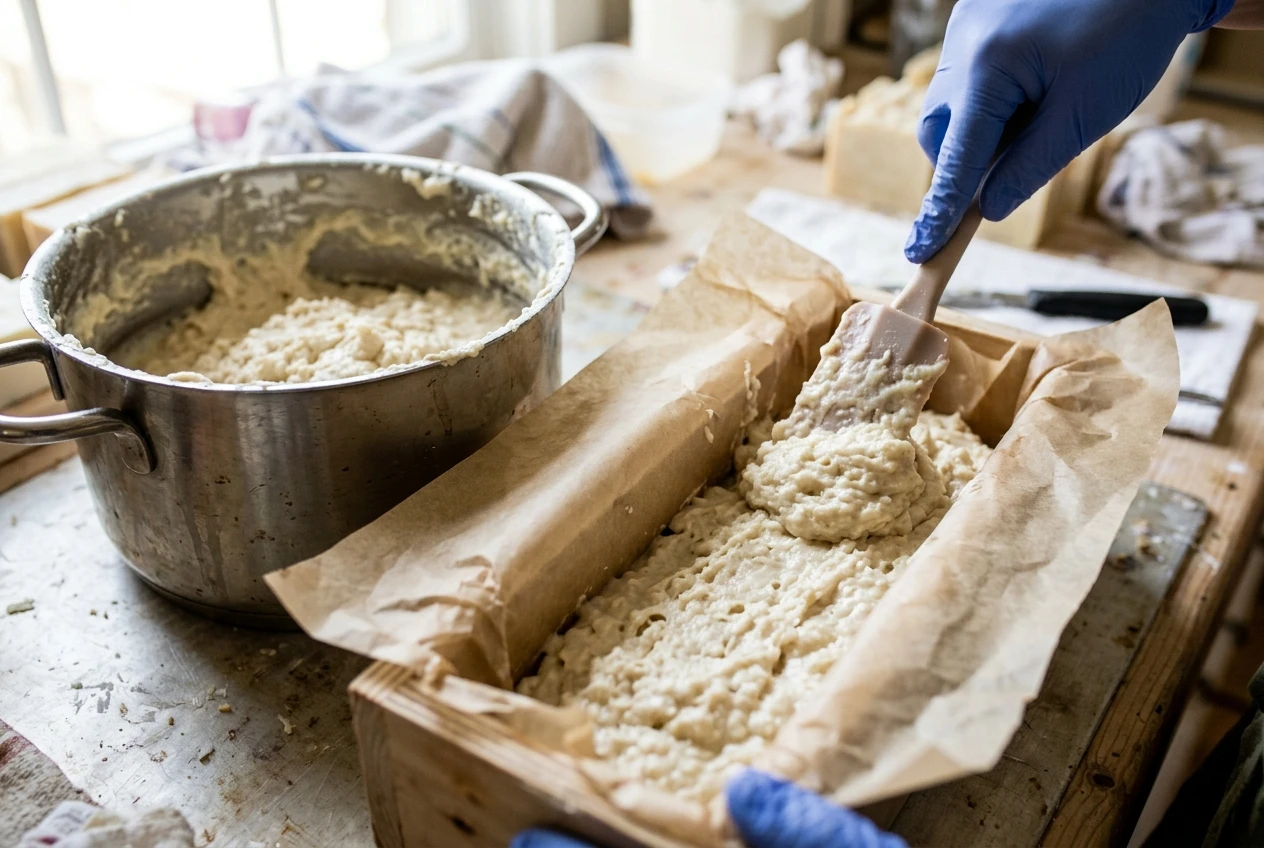
Work in this order:
- Spoon the batter into the mold in portions. Do not wait for it to level.
- Press each portion down firmly with a spatula or a gloved hand, paying special attention to the corners and edges. Gaps there become holes in the finished bar.
- Tap the mold on the counter every few spoonfuls to compact the batter.
- Smooth or texture the top. A wet spatula smooths it well enough. Otherwise, press peaks into the surface.
- Cover and insulate as you normally would, then check the batch within an hour or two for overheating.
Expect a rougher bar with some air pockets and a crumbly appearance when cut. The soap itself is still soap. Once it has cured it will wash perfectly well, even if it looks rustic. If the bars are too crumbly to use, they can be rebatched later using the method in the next section.
If the clumps are very dry and will not press together, treat the batch as stage three.
Rescue at stage three: soap that has set in the pot, and when rebatching or hand-shaping makes sense
Soap that has become a solid mass in the pot cannot be poured or pressed, but it is not wasted. You have two realistic options, and both start with leaving the soap to cool and firm up so that you can handle it safely in gloves.
Rebatching
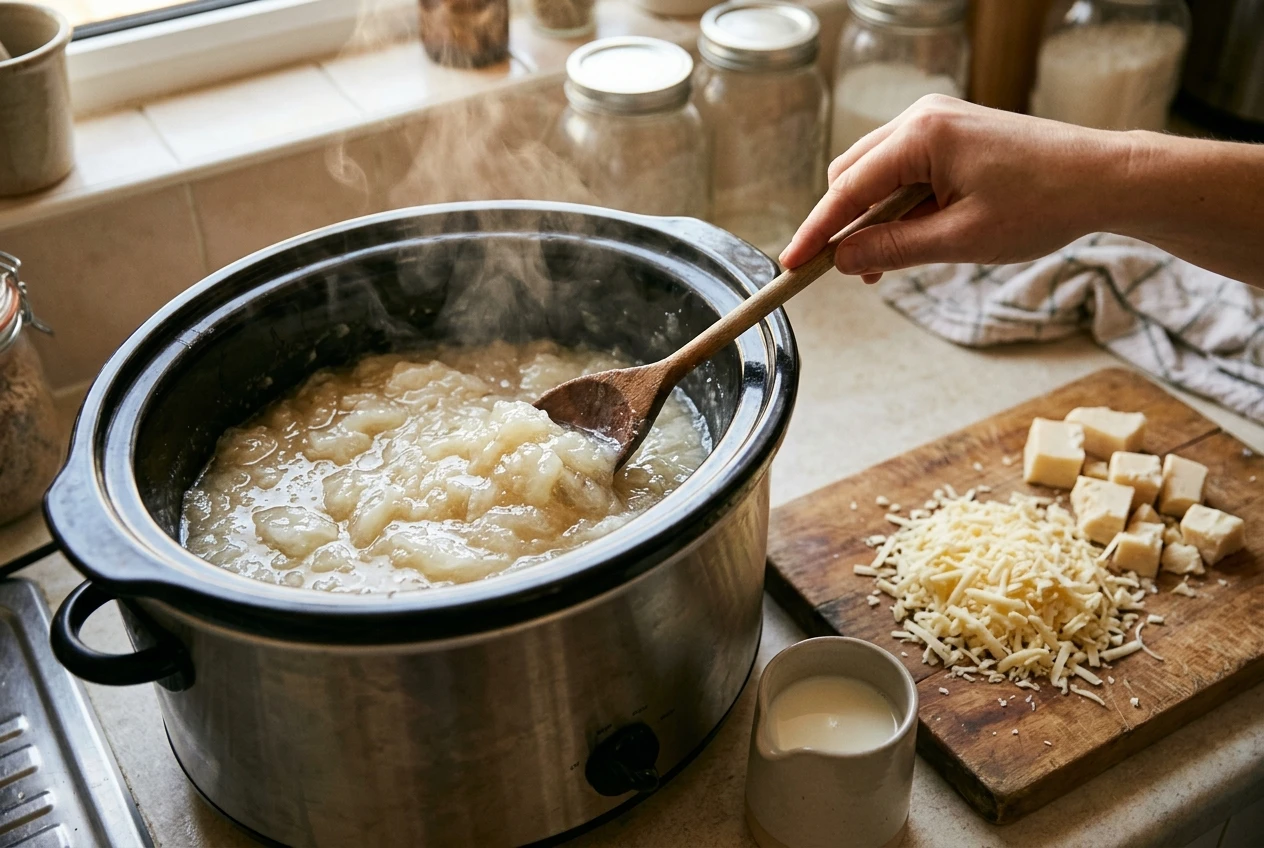
Rebatching melts the soap down again so it can be shaped. It works for stage three batches and for crumbly stage two bars.
- Once the soap is firm, cut or break it into small pieces, or grate it.
- Put the pieces in a slow cooker or a heatproof bowl set over simmering water, with a small amount of liquid such as water, milk or tea. Start with a little. You can add more, but you cannot take it out.
- Heat gently and stir now and then. The soap will soften and turn gel-like, like thick mashed potato or translucent pudding.
- Add fragrance, essential oil or other heat-sensitive ingredients at the end, once the heat is off and the mix has cooled slightly. Then pack the mixture into the mold.
- Press it in firmly, let it cool and harden, then unmold and cut.
Rebatched soap usually has a more rustic, textured appearance than regular cold process soap. If you’re rebatching a freshly seized batch, remember that the soap may still be going through saponification. Keep your protective equipment on while handling it, and allow the finished bars adequate time to cure and dry.
Before using the soap, check that the bars are firm, evenly mixed, and free from unusual oily spots, liquid separation, or visible pockets. If you suspect an error in your lye measurements or incomplete mixing, don’t assume the batch is safe simply because it has hardened or cured.
The guide on how long handmade soap should cure explains why drying time still matters.
Hand-shaping
If the soap is still warm and pliable when you reach it, you can roll or press it into balls, rounds or free-form bars by hand. Wear gloves, because the soap is caustic until fully saponified. If the soap has already cooled and hardened, rebatching is the better option.
Choose hand-shaping when the batch is small and you like the rustic look. Choose rebatching when you want uniform bars, or when the soap is too hard to shape by hand.
Working backwards from the clues: fragrance and essential oils, temperature, additives, and over-blending
The way the batch seized points to the likely cause. Match what you saw to the list below, and check your recipe notes.

Seized right after adding fragrance or essential oil. This is the most common pattern. Some fragrance oils, especially those containing vanillin, speed up trace sharply, and certain essential oils are widely reported to accelerate it as well, such as cinnamon and clove. Check the supplier’s notes for the oil you used. If you have to use a fragrance that accelerates trace, mix it in by hand at the lightest trace you can, and have the mold ready. Some makers also run a small test batch before committing to a full one.
Seized while stick blending, with no fragrance added. Over-blending is a likely cause. A stick blender whips the batter fast, and a few extra seconds can push it past the pourable point. Blend in short bursts and stir by hand between them.
The pot felt hot, or the batch seized quickly after pouring in the lye water. Temperature is the usual cause. Hot oils, hot lye water, or both, speed saponification. If you soap warm, try letting both cool further before combining them.
Seized after adding an additive. Sugar, honey, milk and some clays or botanicals can raise the temperature or thicken the batter, which brings trace forward. The guide to soap additives for cold process soap goes through what common additives do in the pot. Adding them at a very light trace, or dissolving them into the liquid first where that suits them, gives you more working time.
Seized with a recipe heavy in hard oils. Recipes with high proportions of hard oils and butters trace faster than recipes with a lot of liquid oils. If your recipe is hard-oil heavy and always seems to move quickly, you may need to soap cooler and blend less.
Seized with no obvious cause. Check the recipe for measurement errors, such as too little water or an unintended change in oils. Run the numbers through a lye calculator again, and read how to use a soap lye calculator safely if you are unsure which settings matter. An error in the water amount alone can change how fast a batch thickens.
Keep notes on what you used, the temperatures, how long you blended, and when the batter changed. After two or three batches those notes will show which factor is behind your trouble.
If you’re still learning the basics, my Cold Process Soap Making Guide walks you through the process from measuring ingredients to pouring your finished batch.
A pre-pour checklist to keep the next batch from seizing
Run through this list before you combine lye water and oils.
- Check the fragrance or essential oil. Look up whether it is known to accelerate trace. If it is, plan for a lighter trace and a fast pour.
- Read the recipe for heavy hard oils. If it has a high proportion of hard oils and butters, plan to soap cooler and blend less.
- Measure temperatures. Confirm that oils and lye water have both cooled to the range you normally soap at. Do not combine them while either is hot.
- Prepare the mold fully. Line it and place it where you will pour, with spatulas and spoons within reach.
- Decide your design in advance. Pick a simple design if you are using a fast-moving fragrance or additive.
- Prepare additives. Measure them out, and dissolve or mix them as needed before the batter reaches trace, so you do not waste time at the pot.
- Plan to blend in bursts. Use a few seconds of stick blending, then stir by hand and check the batter.
- Add fragrance last, at a light trace. Stir it in by hand if you suspect the oil will accelerate trace.
- Keep your gloves and eye protection on until the batch is in the mold and covered.
- Write down what you did. Record temperatures, oils, additives, and blending time, so the next adjustment is based on facts.
© 2026, Tes. All rights reserved.