
If you’ve spent any time reading soap recipes, you’ve probably come across the phrase “bring the soap to trace.”
For new soap makers, trace can seem confusing. How do you know when you’ve reached it? What does it look like? And why is it so important?
Learning to recognize trace is one of the most important skills in cold process soap making. Once you understand it, you’ll have much more control over your recipes, colors, fragrances, and designs.
In this guide, I’ll explain exactly what trace is, how to recognize the different stages, what affects trace speed, and how to avoid some of the most common beginner mistakes.
What Does Trace Mean in Soap Making?
Trace is the point during soap making when the oils and lye solution have emulsified and begun the saponification process.
Before trace occurs, the oils and lye water can still separate from each other.
Once trace is reached:
- The mixture becomes thicker.
- Oils and lye stay fully combined.
- The soap batter begins transforming into soap.
- Additives, fragrances, and colorants can be safely incorporated.
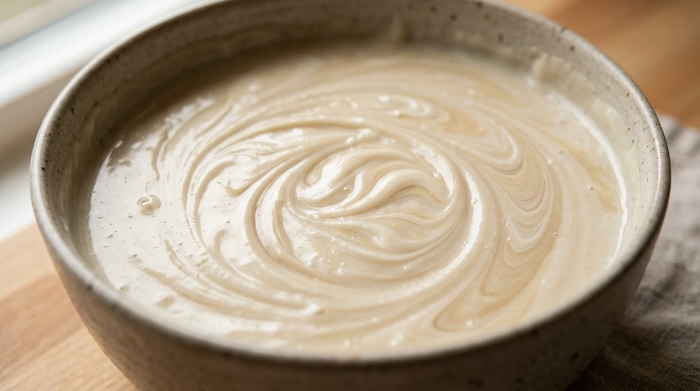
Think of trace as the stage where your soap batter changes from a thin liquid into something resembling pudding or cake batter.
If you’ve ever made homemade gravy or pudding, the thickening process is somewhat similar.
Why Is Trace Important?
Reaching trace ensures that your oils and lye are properly mixed together.
If you pour soap before the mixture reaches a stable emulsion, you may experience:
- Oil separation
- Lye pockets
- Uneven saponification
- Soft or unusable soap
Trace provides confidence that the soap-making process is moving in the right direction.
If you’re new to cold process soap making, I recommend reading my guide on Cold Process Soap Making for Beginners , which walks you through the entire soap-making process from measuring oils and lye to curing your finished bars.
The Different Stages of Trace
Not all trace looks the same.
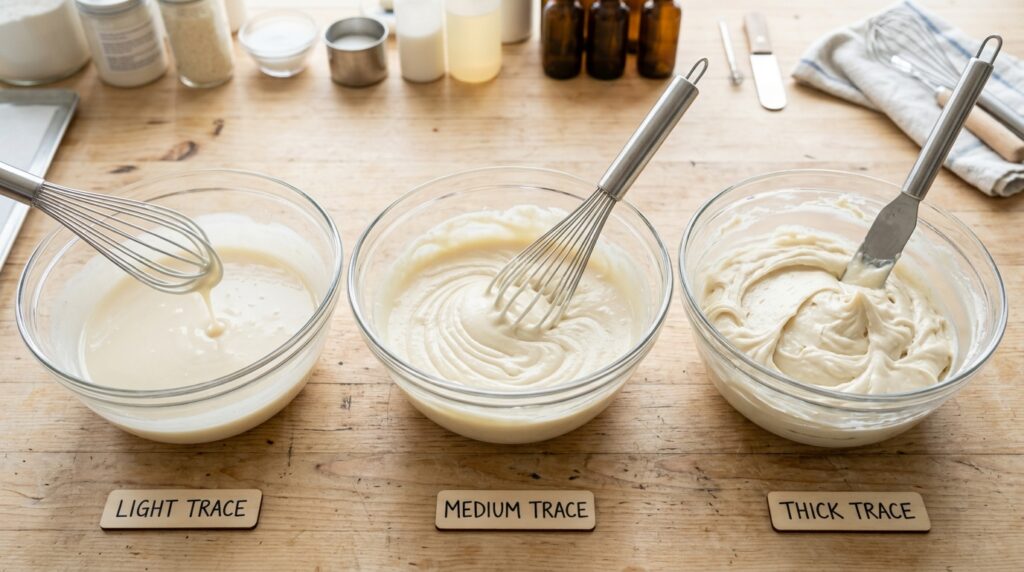
Soap makers generally refer to three common stages:
Light Trace
Light trace is the earliest stage.
The soap batter is still fairly thin but leaves a faint trail when dripped across the surface.
Characteristics:
- Similar to thin cake batter
- Easy to pour
- Excellent for intricate swirls
- Gives maximum working time
Many soap makers prefer light trace for artistic designs.
Medium Trace
Medium trace is slightly thicker.
The soap batter leaves visible lines on the surface that remain for several seconds.
Characteristics:
- Similar to pudding
- Easy to work with
- Ideal for most recipes
- Holds simple designs well
Many beginner soap makers find medium trace easiest to recognize.
Thick Trace
Thick trace resembles thick pudding or custard.
The soap batter becomes much heavier and may even hold peaks.
Characteristics:
- Holds texture well
- Useful for textured tops
- Less suitable for complex swirls
- Can become difficult to pour
Once soap reaches thick trace, you need to work quickly.
What Does Trace Look Like?
One of the easiest ways to identify trace is with a spoon or stick blender.
Lift the blender slightly above the surface and drizzle some batter back into the pot.
If the drizzled soap leaves a visible line or “trace” across the surface before sinking back in, you’ve reached trace.
The thicker the line remains, the thicker the trace.
A quality stick blender makes it much easier to recognize trace and achieve a stable emulsion quickly. If you’re still building your soap-making toolkit, a reliable immersion blender is one of the most valuable pieces of equipment you can own.
How Long Does It Take to Reach Trace?
This depends on many factors.
Some recipes reach trace in less than a minute, while others may take several minutes of blending.
Factors that affect trace include:
Oil Selection
Certain oils accelerate trace.
Faster-tracing oils include:
- Palm oil
- Palm kernel oil
- Cocoa butter
- Shea butter
Slower-tracing oils include:
- Olive oil
- High-oleic sunflower oil
- Rice bran oil
Understanding how different oils affect trace is an important part of formulating successful recipes. You may also enjoy reading Soap Making Oils and Their Properties to learn how each oil contributes to hardness, lather, conditioning, and trace speed.
This is one reason Castile Soap made with 100% olive oil often takes longer to trace. If you’d like to learn more, see my guide to Castile Soap and why olive oil behaves differently from many other soap-making oils.
Water Amount
Recipes with less water often reach trace faster.
Water-discounted recipes generally thicken more quickly than full-water recipes.
Using a reliable lye calculator helps ensure your water and lye amounts are accurate for every batch. If you’re unsure how to calculate your recipe, see my guide on How to Use a Lye Calculator.
Temperature
Warmer oils and lye solutions usually speed up trace.
Cooler temperatures often provide more working time.
Fragrance Oils
Some fragrance oils dramatically accelerate trace.
Floral fragrances are especially known for this.
Always research fragrance behavior before using a new scent.
For more information, see my article on Essential Oils vs Fragrance Oils in Soap Making, where I explain the differences between natural essential oils, fragrance oils, scent retention, and how each affects soap batter.
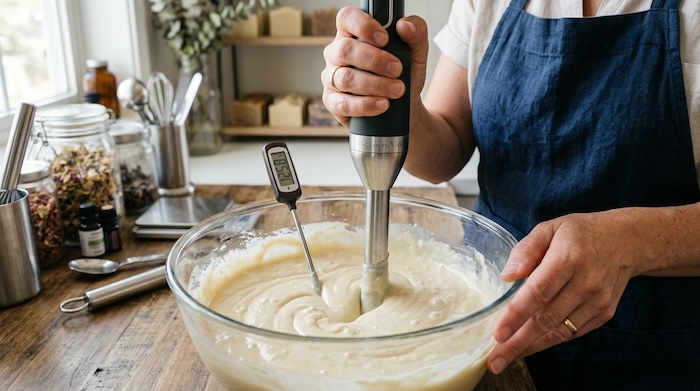
Stick Blending
A stick blender can reduce trace time from several minutes to less than one minute.
Most modern soap makers alternate between short bursts of blending and hand stirring.
False Trace vs Real Trace
One common beginner mistake is confusing false trace with actual trace.
False trace occurs when solid fats begin cooling and thickening before proper emulsification occurs.
This often happens when:
- Temperatures are too low
- Hard oils begin solidifying
- The batter thickens artificially
The mixture may appear thick while still not being fully emulsified.
To avoid false trace:
- Ensure hard oils are completely melted.
- Soap within recommended temperature ranges.
- Continue mixing until a stable emulsion is achieved.
Monitoring your temperatures carefully can help prevent false trace, especially when working with recipes that contain a high percentage of hard oils and butters.
An infrared thermometer allows you to quickly check the temperature of both your oils and lye solution without direct contact, making it one of the most useful tools for consistent soap making.
Can You Overmix Soap Batter?
Yes.
While reaching trace is essential, excessive blending can cause the batter to thicken too quickly.
Overmixing can:
- Reduce swirl opportunities
- Cause fragrance acceleration issues
- Make pouring difficult
- Create rough-looking bars
Many experienced soap makers stop blending once they reach a stable light trace.
If you enjoy creating decorative designs, maintaining a lighter trace gives you much more time to work. You might also enjoy my guide on Soap Swirls for Beginners, where I cover several easy swirl techniques that work well at light trace.
When Should You Add Colorants and Fragrances?
Most soap makers add colorants and fragrances at light trace.
This allows:
- Better color distribution
- Easier swirling
- More working time
- Improved design flexibility
If you’re planning intricate designs, keeping the batter at light trace can make the process much easier.
Many soap additives behave differently depending on the stage of trace. If you regularly use ingredients such as honey, clays, milk, or sodium lactate, you’ll want to understand how they can affect the speed at which your batter thickens.
You may also enjoy reading my guide on Using Sodium Lactate in Soap Making to create harder bars that unmold more easily.
Common Beginner Mistakes with Trace
Blending Continuously
New soap makers often hold the stick blender on constantly.
Use short bursts instead.
Waiting Too Long
Thick trace can happen surprisingly fast.
Once you reach your desired consistency, pour promptly.
Using Fast-Moving Fragrances
Some fragrances can turn light trace into thick trace within seconds.
Always test new fragrances in small batches first.
Confusing Thickness with Emulsification
A thick batter doesn’t always mean proper trace.
Make sure the oils and lye are fully combined before pouring.
Having the right equipment can make a huge difference when you’re learning to recognize trace. A good digital scale, quality stick blender, and durable silicone molds help create more consistent results from batch to batch.
My Personal Experience with Trace
When I first started making soap, I worried constantly about whether I’d reached trace.
In reality, most beginners tend to overmix rather than undermix.
Today I usually stop blending at a stable light trace because it gives me more flexibility for adding colors, fragrances, and swirls.
The more batches you make, the easier it becomes to recognize exactly where your soap batter is.
Eventually, you’ll be able to tell almost instantly whether you’ve reached light, medium, or thick trace.
One thing I’ve learned over the years is that every recipe behaves a little differently. The more batches you make, the more you’ll start recognizing how different oils, temperatures, fragrances, and additives influence trace.
If you’re still building confidence, my guide on Common Soap Making Mistakes covers many of the issues new soap makers encounter during their first few batches.
Frequently Asked Questions
Can soap be poured before trace?
It’s best to wait until at least a stable light trace or emulsion has formed to prevent separation issues.
Is thicker trace better?
Not necessarily. The best trace depends on your design goals. Light trace is often preferred for swirls, while thick trace works well for textured tops.
Why does my soap reach trace so quickly?
Common causes include high temperatures, water discounts, fast-moving fragrance oils, and recipes high in hard oils.
Why is my soap taking forever to reach trace?
Recipes high in olive oil, cooler temperatures, and high water content often slow trace.
Does every soap recipe trace differently?
Yes. Oil selection, water amount, fragrance choice, temperature, and additives all influence how quickly trace develops.
Final Thoughts
Understanding trace is one of the biggest milestones in becoming a confident soap maker.
Once you learn to recognize light, medium, and thick trace, you’ll have far more control over your recipes and designs.
The good news is that trace becomes easier to identify with every batch you make. Before long, you’ll instinctively know exactly when your soap batter is ready to pour.
Related Soap Making Articles
- Cold Process Soap Making for Beginners
- Soap Making Oils and Their Properties
- How to Use a Lye Calculator
- Essential Oils vs Fragrance Oils in Soap Making
- Castile Soap: Benefits and Considerations
- Soap Swirls for Beginners
- Using Sodium Lactate in Soap Making
- Common Soap Making Mistakes and How to Avoid Them
Disclosure:
The information provided on this website is for educational purposes only and should not be considered professional advice. Always practice proper safety when making soap or skincare products.
This post may contain affiliate links. As an Amazon Associate, I earn from qualifying purchases at no additional cost to you.
© 2026, admin. All rights reserved.