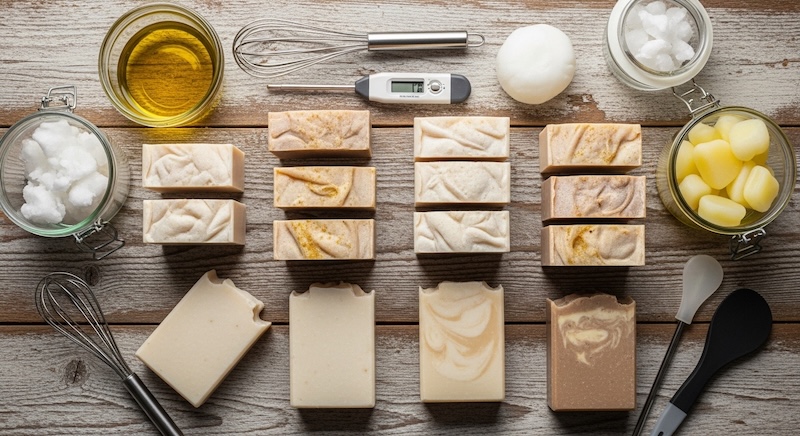
Over the years, I’ve created many cold process soap recipes. Some turned out too soft, others too hard, and a few didn’t hold up well in the shower. After plenty of experimenting, I always found myself going back to a few dependable favorites.
These are the 5 basic cold process soap recipes I use most often. They produce reliable, long-lasting bars with beautiful lather and balanced hardness.
I’ve included two batch sizes that will give you approximately 15 or 30 bars of soap, depending on the recipe.
A Note About Using Canola Oil in Soap
Many soap makers substitute canola oil for olive oil because it’s less expensive. You can do this — but be cautious.
If your recipe contains more than 70% canola oil, your bars may:
-
Be too soft
-
Not last as long in the shower
-
Develop dreaded orange spots (DOS) over time
For best results, keep canola oil under 70% of your total oils.
Recipe #1 – My Most Used Soap Recipe (30 Bars)
This is my go-to recipe. It produces a hard, long-lasting bar that holds up beautifully in the shower. It has just enough coconut oil to create a rich lather — even in hard water.
Ingredients:
- 1800 g Olive Oil
- 450 g Coconut Oil
- 300 g Palm Kernel Oil
- 250 g Palm Oil
- 250 g Grapeseed Oil
- 420 g Lye (Sodium Hydroxide)
- 4.5 cups (1085 g) Water
Yield: Approximately 30 bars
Recipe #2 – Gentle Baby Soap Recipe (15 Bars)
I use this recipe for baby soap and sensitive skin bars. It has a high olive oil content for mildness, plus calendula and almond oil for added skin benefits.
Ingredients:
- 850 g Olive Oil
- 250 g Coconut Oil
- 200 g Palm Oil
- 100 g Almond Oil
- 90 g Calendula Oil
- 25 g Grapeseed Oil
- 215 g Lye (Sodium Hydroxide)
- 2–2.25 cups (500 g) Water
Yield: Approximately 15 bars
If you’re creating a full baby skincare set, this bar pairs beautifully with my homemade Baby Lotion Recipe and natural Baby Powder Recipe for sensitive skin.
Recipe #3 – Traditional Castile Soap (100% Olive Oil)
This is a classic Castile soap recipe made with 100% olive oil.
Castile soap bars are:
- Extremely mild
- Gentle on sensitive skin
- Low-lather
- Long curing (allow extra cure time for hardness)
Ingredients:
- 1500 g Olive Oil
- 188 g Lye (Sodium Hydroxide)
- 2 cups (434 g) Water
Recipe #4 – Hard & Bubbly Bar (High Lather Recipe)
This recipe creates a harder bar with extra cleansing power and lots of bubbles.
Ingredients:
- 1800 g Olive Oil
- 625 g Coconut Oil
- 625 g Palm Oil
- 420 g Lye (Sodium Hydroxide)
- 4 cups (920 g) Water
Recipe #5 – Balanced Conditioning Bar
This recipe creates a balanced bar with good hardness, conditioning, and lather.
Ingredients:
- 1134 g Palm Oil
- 907 g Olive Oil
- 794 g Coconut Oil
- 100 g Grapeseed Oil
- 85 g Almond Oil
- 427 g Lye (Sodium Hydroxide)
- 4.8 cups (1125 g) Water
Basic Cold Process Soap Making Instructions
If you’re new to soap making, here’s a simple step-by-step overview.
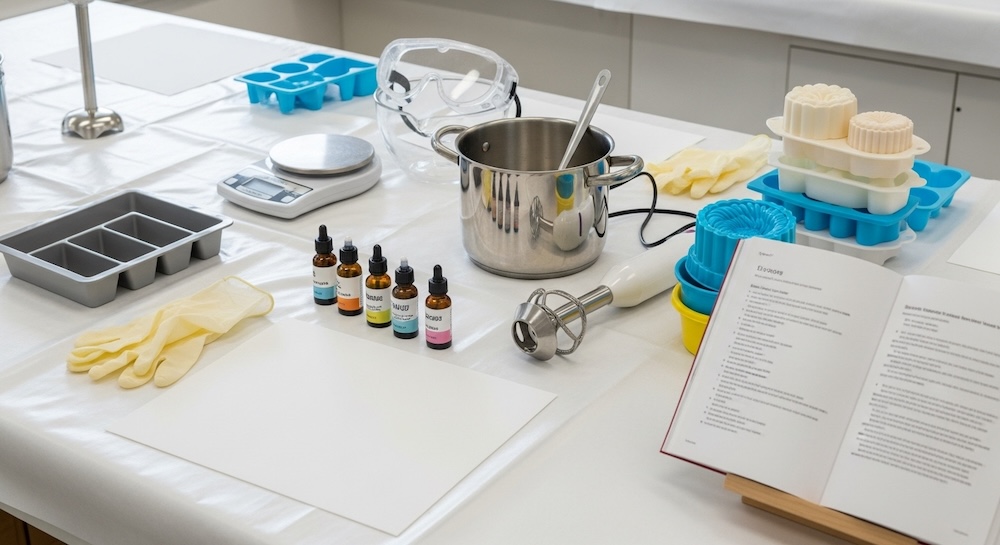
Step 1: Prepare Your Workspace
Gather all ingredients and equipment before starting:
- Safety goggles
- Gloves
- Apron
- Stainless steel pot
- Scale
- Stick blender
- Soap mold
Not sure what tools you need? Here’s my complete Soap Making Equipment Guide with everything I personally use in my soap room.
Step 2: Mix Lye Solution
- Put on protective gear.
- Measure your water into a heat-safe container.
- Measure your lye separately.
- Slowly add lye to water (never water to lye).
- Stir until fully dissolved.
⚠️ This must be done in a well-ventilated area.
The mixture will heat to approximately 180°F. Set aside to cool.
If you’re new to working with lye, I highly recommend reading my detailed Lye Safety Guide for Soap Making before getting started.
Step 3: Heat the Oils
- Weigh oils using a scale.
- Heat gently to about 130°F.
- Remove from heat and allow to cool to about 100°F.
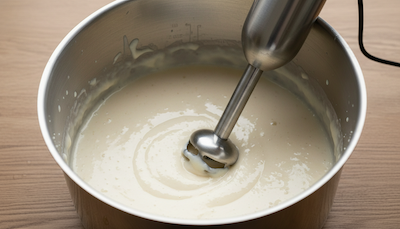
Step 4: Combine & Mix
When both the oils and lye solution are around 100°F:
- Slowly pour the lye solution into the oils.
- Use a stick blender to mix.
- Blend until trace (the mixture thickens and leaves a visible line when drizzled).
Step 5: Add Fragrance & Color
Once trace is reached:
- Add essential oils or fragrance oils
- Add natural colorants if desired
- Stir thoroughly
Before adding essential oils, make sure you’re using safe usage rates and skin-safe oils. I always recommend reviewing my Essential Oils Safety Guide for Soap Making before formulating your blend.
Step 6: Mold & Cure

- Pour into lined molds.
- Cover and insulate (wrap with a blanket).
- Let sit 24–48 hours.
- Remove from mold and cut.
- Cure for 4–6 weeks before use.
Final Thoughts on These Basic Soap Recipes
These recipes have stood the test of time in my soap room. Whether you’re making soap for family, gifting, or selling, having a few reliable base recipes makes everything easier.
You can customize any of these with:
- Essential oils
- Natural clays
- Botanicals
- Swirls and color designs
Once you master the basics, the creative possibilities are endless.
Important Note:
This information is for educational purposes only.
This post may contain affiliate links. If you make a purchase through these links, I may earn a small commission at no extra cost to you.
Updated Feb 2026
© 2017 – 2026, Tes. All rights reserved.
Wow thanks so much .I have gotten all that I needed here.
Your welcome, I’m glad you have been able to find everything you need to make your own soap. I’m always adding new content so be sure to check back.
Thanks so much for this info
Your Welcome Claudia
Been making soap for 20 yrs, only for myself, and your #4 is very close to what I use. Get 16 4 oz bars from it but let it stay in molds for about 5-7 days and then cut. Ready in 6 wks or so. Your info is on the money. Just finiahed making a batch about an hour ago,
Thanks for the information Fred. Happy Soaping.