Make Natural Soap Bars

Natural Soap making can be a fun hobby, but I have to warn you it can be very addictive as well.
I started making soap for myself a long time ago and found there were so many colors and scents to play with that soon I had more soap than my friends, family, and myself needed so I started selling it. The more I made, the more different colors and scents, and techniques I wanted to try so….if you
have decided you want to start making your own soap……become a soap maker, follow me and I’ll give you all the information you will need to get started whether you make soap for yourself, as a hobby to sell at craft fairs and events or to turn it into a business. I have done all three!
Making Natural soap bars can be a relatively inexpensive hobby when starting out as long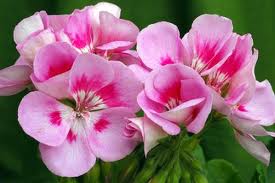 as you keep to the basics.
If you want to get fancy with different colors and scents it can get start to get more expensive, especially if you are using essential oils.
Some essential oils are not too expensive but some can be very costly such as Rose Absolute – $400 for 50 ml or Rose Otto $1000 for 50 ml, using more affordable oils like Rose Geranium at $42 for 50 ml. will keep your costs down and it has a scent that in my opinion smells just as nice as Rose Absolute.
The first soap-making technique I used and will mostly talk about is the Cold Process Method of soap making. With this method of soap making, the soap maker will need to heat the oils using an element and the temperatures will need to be monitored.
You will find step-by-step instructions on this technique here Step by Step Cold Process Soap Making
Once this soap is made, poured, and cut it will need to be cured for 4 – 6 weeks.
The link above will give you step-by-step instructions on soap making as well as pictures along the way.
The link below will take you to some soap recipes
Making Natural Soap Recipes
The basic instructions for making cold-process soap are:
Basic Cold Process Soap Making Instructions
Before starting gather all the equipment and ingredients you will need for your soap
Mixing your ingredients:
- Put on your protective clothing, apron, safety goggles, gloves, etc
- Measure your water and pour it into the container you will be using for your lye/water mix
- Measure out your lye (sodium hydroxide)
- Slowly add the lye to the water, stirring to be sure it mixes well. This should be done in a well-ventilated area as the fumes can be quite strong. This will only last for a 15 seconds or so. Stir until the lye is completely dissolved in the water. It will heat up to about 180 degrees and can now be put aside to cool down.
- While the lye/water is cooling use a scale and measure each of your soap oils and put into your stainless steel pot.
- Place this pot on your stove or hot plate and turn on low to heat to approximately 130 degrees.
- Once the oils have heated to 130 degrees take off the stove or hot plate and let them cool down to about 100 degrees.
- When the lye/water mix and the oils are both cooled down to about 100 degrees they are ready to be mixed.
- Slowly add the lye/water mix to your soap oils and stir you can use a stick blender and hand mix. Mix the soap until it traces. This is when the soap begins to thicken; you can test this by using your spoon to drizzle the liquid into the pot. You will see a trace that stays on the surface of the soap mixture.
- Once the soap has traced this is the time to add your scent and color.
- Mix the scent and color in well
- Pour this mixture into the lined molds, cover it with a piece of cardboard or plastic, put it to bed (place a blanket over the soap mold) and let set for a day or two.
- Once it has sat for a day or two, remove the soap from the mold and cut and put it out to cure for 4 to 6 weeks.
There are other methods of soap making, but this is the tried and true method, the method our grandmothers used.
You will need to start by getting together some necessary supplies to start. So next on to Soap Making Supplies
Enjoy your soap making and come back often.
If you have gotten to the point where you think you’d like to build a website, then check out this page. I created my site through this free website program.
© 2017 – 2023, Tes. All rights reserved.
Like most things homemade, I would think making your soap would also be a better product where you know all the ingredients your using. I find today they have such a tendency to put so much crap into products that you’re better off making as much stuff on your own as possible to stay pure or organic.
In your opinion does making your soap save you money or just give you a better product for the price?
Hello Travis,
Thanks for stopping by my website. You know what you are using on your skin when you make your own soap, or buy it from someone that makes natural soap, the store bought products often contain ingredients we really don’t want to put on our skin.
I’m not sure you would save a lot of money making your own. That would depend on the ingredients you use, but at least you have piece of mind knowing what you are putting on your skin.
I’ve never actually tried to make soap but you make it sound very simple to do. My wife and I go to markets every now and then, and there are always stalls that are selling their own soap. After reading your site, I might just have to give it a go. Thanks!
Hi Andrew,
I’m glad to hear I’ve got you thinking of making your own soap, I have been selling at the Farmer’s markets for a long time now, it’s a good place to sell, talk and get to know your customers.